How to Spend ONE to TWO DAYS in Yokohama, Japan: 1 to 2-Day Itinerary
Planning a short trip to Yokohama, Japan? You’ve come to the right place!
For many visitors, Yokohama is just a quick day trip from Tokyo, but it’s so worth giving yourself a little more time if you can. There’s the largest Chinatown in East Asia, waterfront scenery, some pretty cool historic neighborhoods, and lots of stories about samurai. And, of course, tons of good food. The best part is, you can cover a lot of it in just a day or two.
If you don’t know where to even begin, this 1- to 2-day itinerary will help you plan your time here. You can follow it from start to finish or just pick out the places that sound good to you. Let’s get right into it!
Don’t miss out!
Our Top Choice
The tour we loved the most and suggest booking ASAP is this one!
Our FAVORITE thing we did in Yokohama was this private custom tour! From peaceful gardens to charming historic streets, it was such a fun way to see a completely different side of the city.
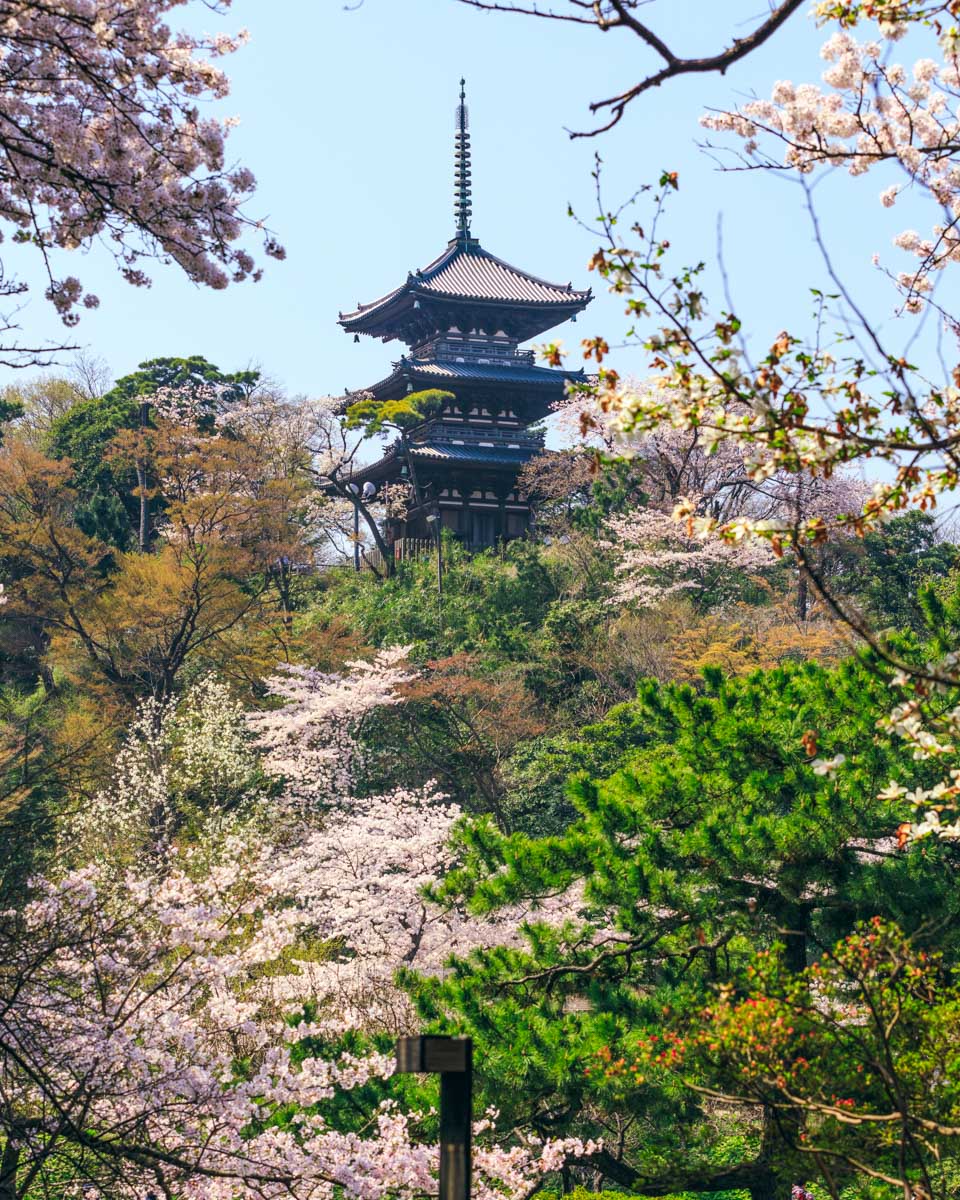
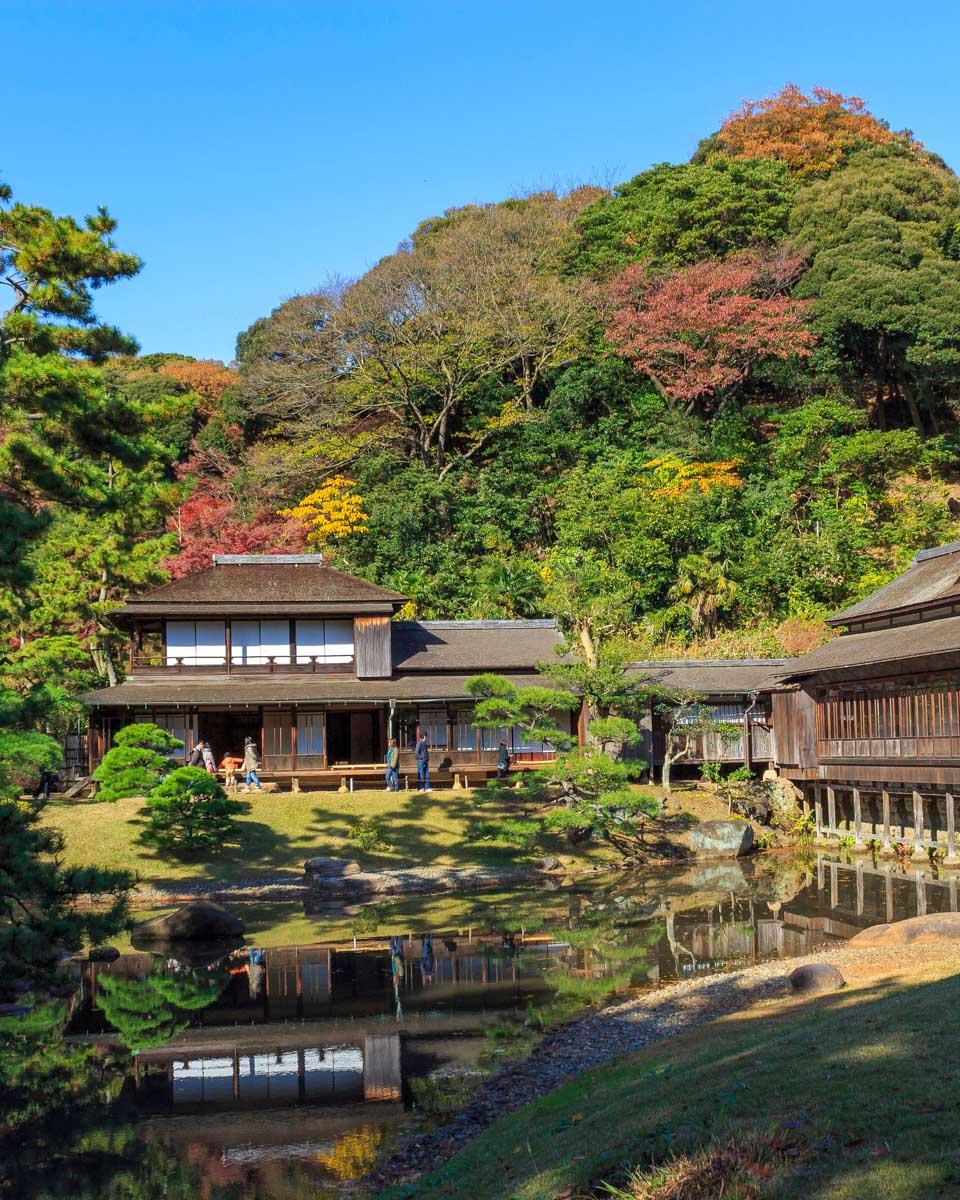
Pagoda in Sankeien Garden
Itinerary Overview
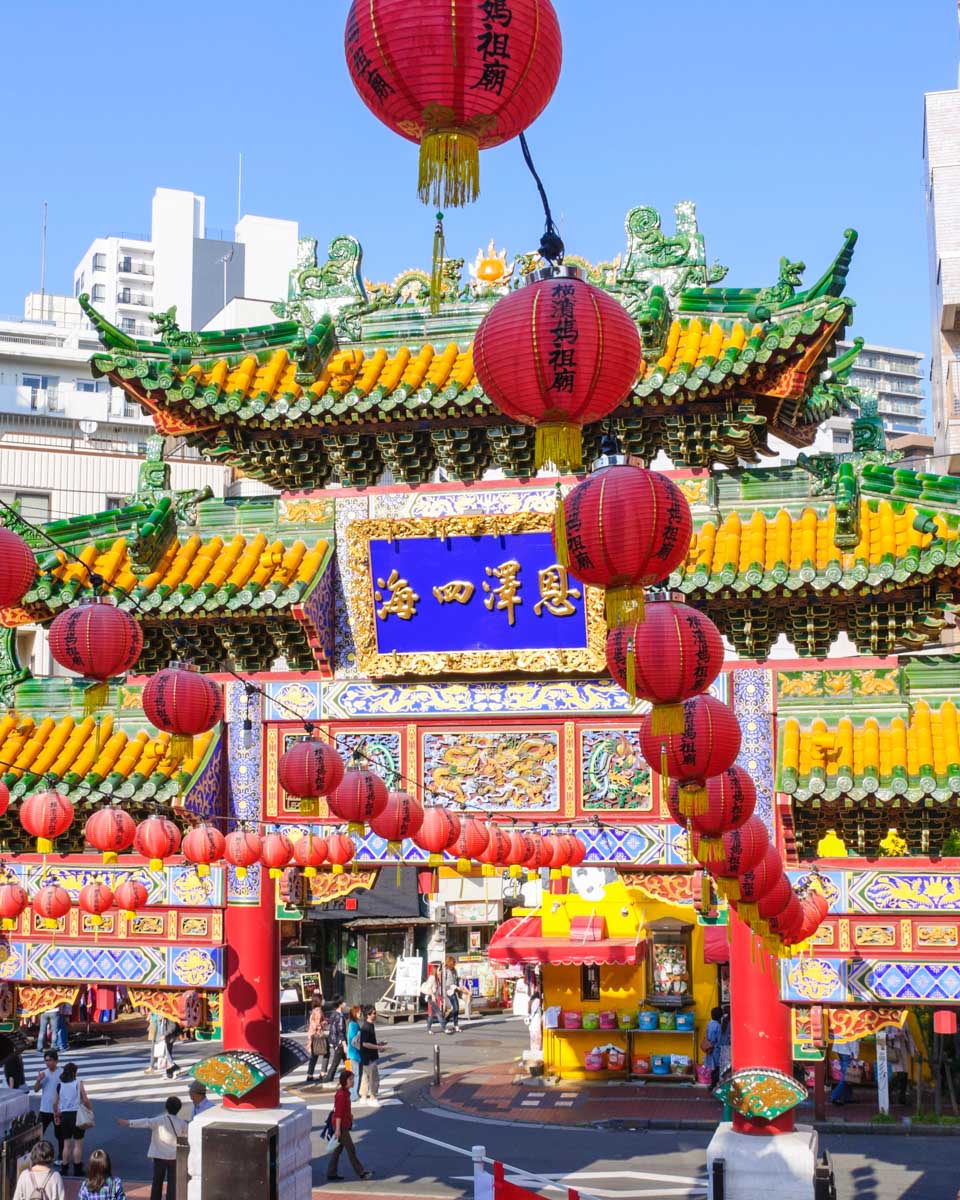
Yokohama is an easy city break from Tokyo, and there’s a lot to see without spending half your day getting from one place to another. You’ve got waterfront views, historic neighborhoods, Chinatown, and great food. There is always something to do, and no matter where you’re staying, this itinerary packs a lot into a day, and most activities are within easy reach.
Getting around Yokohama is pretty easy by train, bus, and on foot. Grab a Suica or PASMO card, and you won’t have to keep buying tickets every time you hop on public transport.
Here is a quick overview of what your two days in Yokohama could look like:
🌆 Day 1: Yokohama Highlights & Noge Nights
Kickstart your day with a private custom tour around Yokohama, followed by a little sightseeing on your own, then wrap it up in Noge with dinner, drinks, and a wander around its charming little streets.
⛩️ Day 2: Kamakura Day Trip & Dinner with a View
Explore Kamakura with a private guide, head back to your hotel to rest, then end the night with a delicious dinner and views over Yokohama.
Day 1
Morning – Explore Yokohama through the eyes of a local
Start your first day with breakfast at your hotel, then meet your local guide in the lobby at 9 am. You’ll have around four hours together on this private custom tour and can choose two or three places you’d most like to see. There’s no private vehicle included, so you’ll explore like a local—walking, using public transport, or grabbing a taxi when it makes sense.
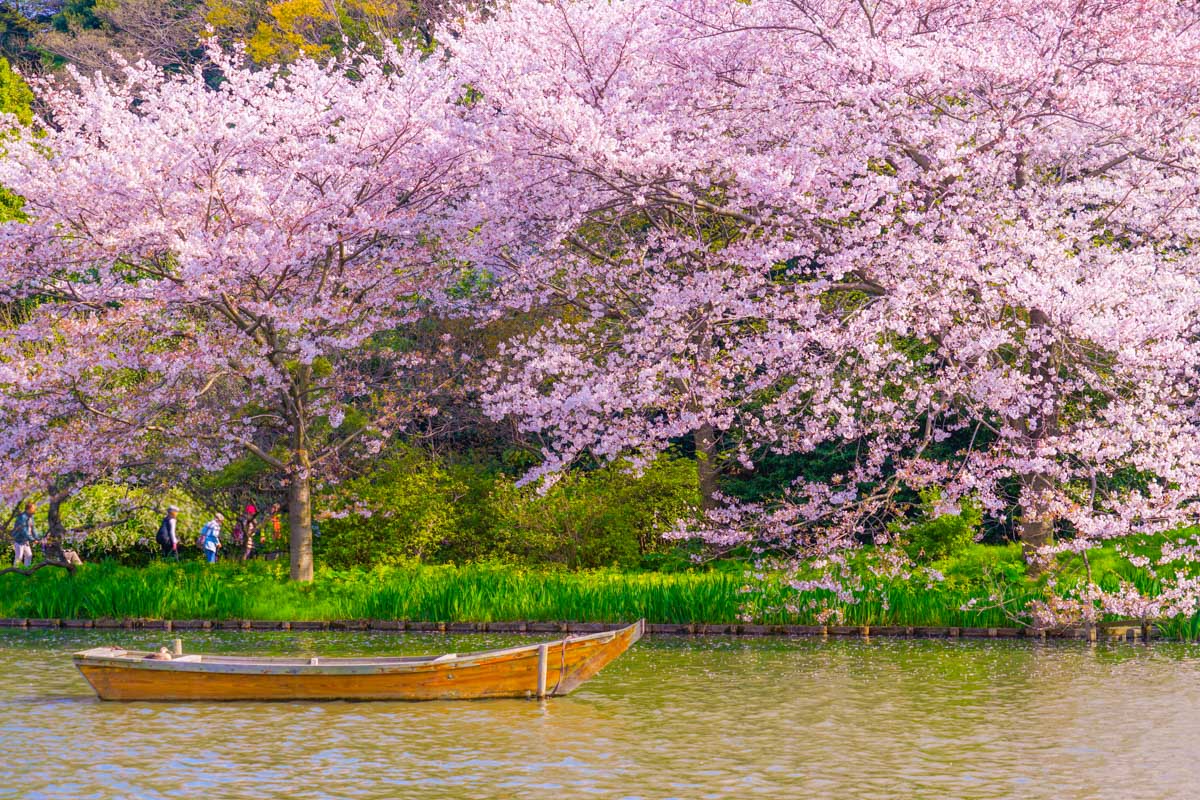
We recommend starting at Sankeien Garden, then heading through Yamate and Motomachi before finishing in Chinatown for lunch. Grab a taxi to the garden—it takes around 20 minutes and is the easiest way to get there. Once you arrive, you’ll find peaceful ponds, winding paths, seasonal flowers, and beautiful old buildings brought here from Kyoto and Kamakura. The garden was created by silk trader and art collector Sankei Hara, and it’s a lovely, relaxed place to start your morning.
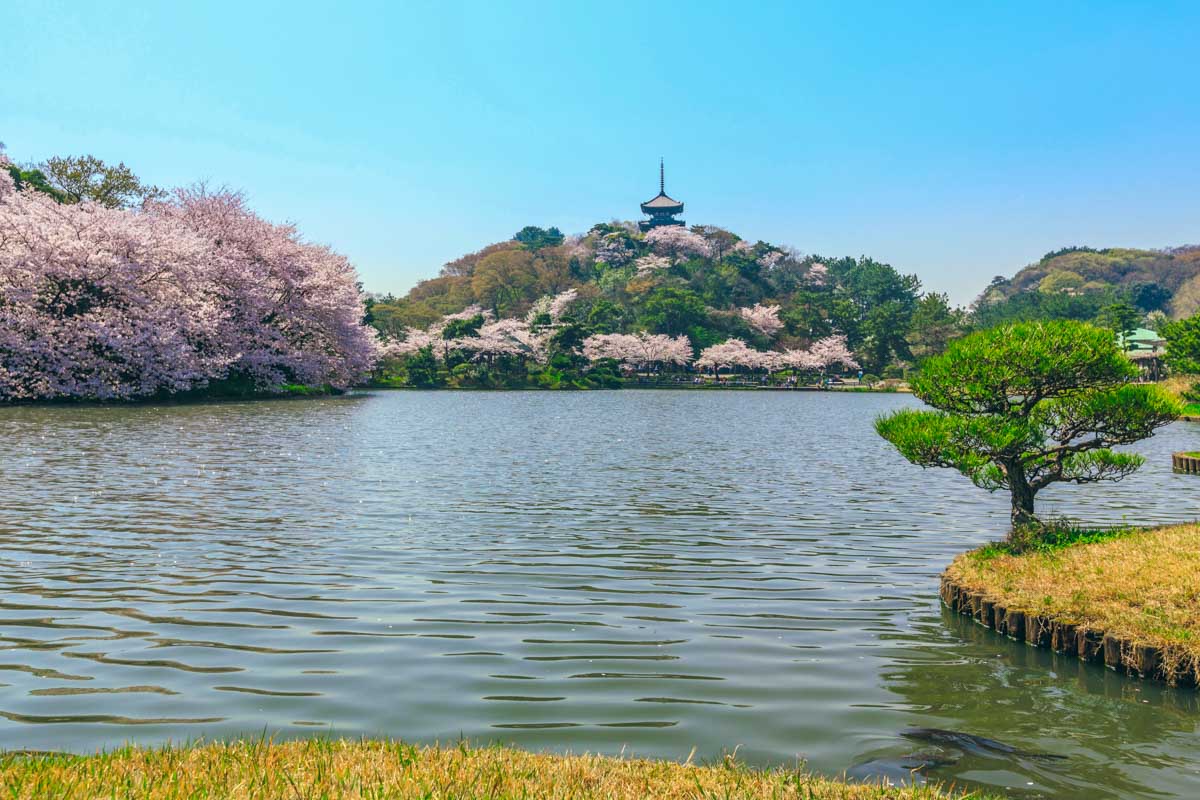
Spend around an hour wandering and admiring the three-story pagoda, tea houses, and historic residences. It currently opens from 7 am to 5 pm on weekends, and 9 am to 5 pm on weekdays, and adult admission costs 900 JPY (~$6 USD).
After that, take a taxi or bus to Yamate, where foreign merchants and diplomats built their homes after Yokohama opened its port. Walk through Motomachi Park and pop into one or two of the old Western-style houses, like Yamate 234 Ban Residence.
Then make your way downhill through Motomachi Shopping Street, filled with cafés, boutiques, and local shops. Ask your guide to finish the tour near Rose Hotel Yokohama in Chinatown at around 1 pm, just in time for lunch. Just remember that transport, admission fees, food, and anything else you buy along the way aren’t included in the tour price, so bring a little extra for the day.
Lunch – Try handmade soup dumplings at Shichifuku
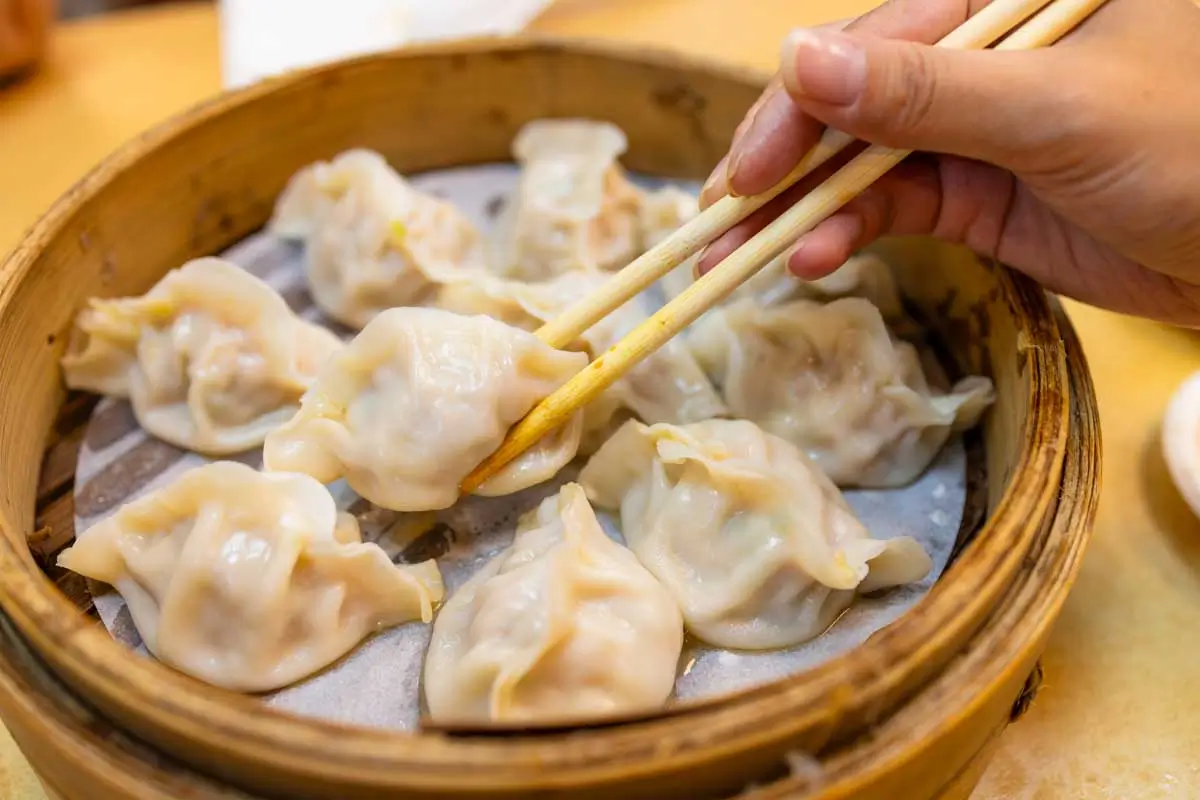
With your morning tour ending in Chinatown, you can head straight over to Shichifuku for lunch. Chances are you’ll be pretty hungry by now, and this casual spot is great for soup dumplings and affordable Chinese food. It’s known for its handmade xiao long bao, made fresh and filled with hot, savory broth. We’d start with the classic pork version, but you can also try shrimp or scallop.
The shrimp dumplings, Peking duck, and spicy shrimp wontons are also good if you’re sharing. There’s a two-hour, 112-dish all-you-can-eat menu, but honestly, that’s probably a bit much for this itinerary. This place opens daily from 10:30 am to 10 pm, but we suggest coming right when your tour ends around 1 pm and leaving by 2:30 pm; then it’s just a three-minute walk to Kanteibyo Temple.
Online reservations may require you to choose the all-you-can-eat menu, so if you’re ordering individual dishes, just walk in. It can get busy on weekends and public holidays, though, so you might have to wait for a table.
Afternoon – Walk from old Yokohama to the modern waterfront
After a relaxed lunch at Shichifuku, spend the rest of the afternoon making your way along Yokohama’s waterfront toward Minato Mirai. The walk is around 4 kilometers (2.5 miles) and mostly flat, with plenty of time to stop for harbor views, take photos, or just sit down and enjoy the scenery for a bit.
Stop 1: Visit Kanteibyo Temple
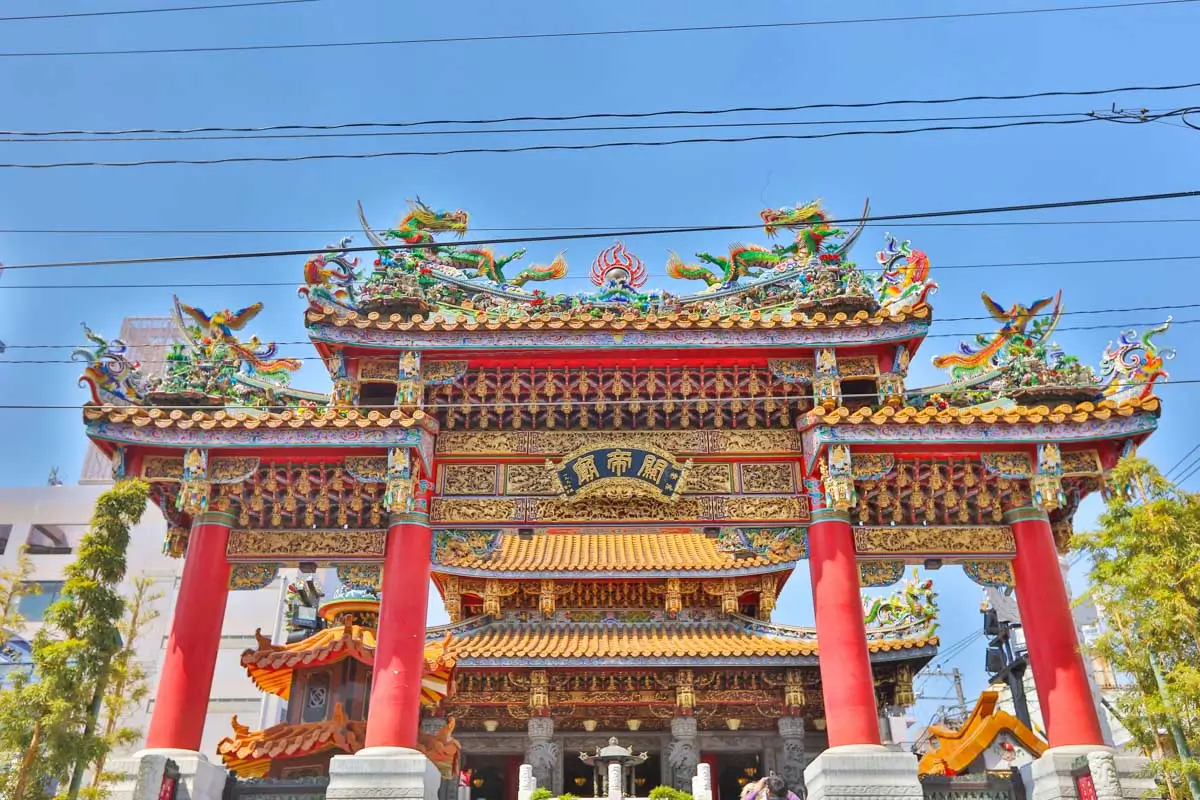
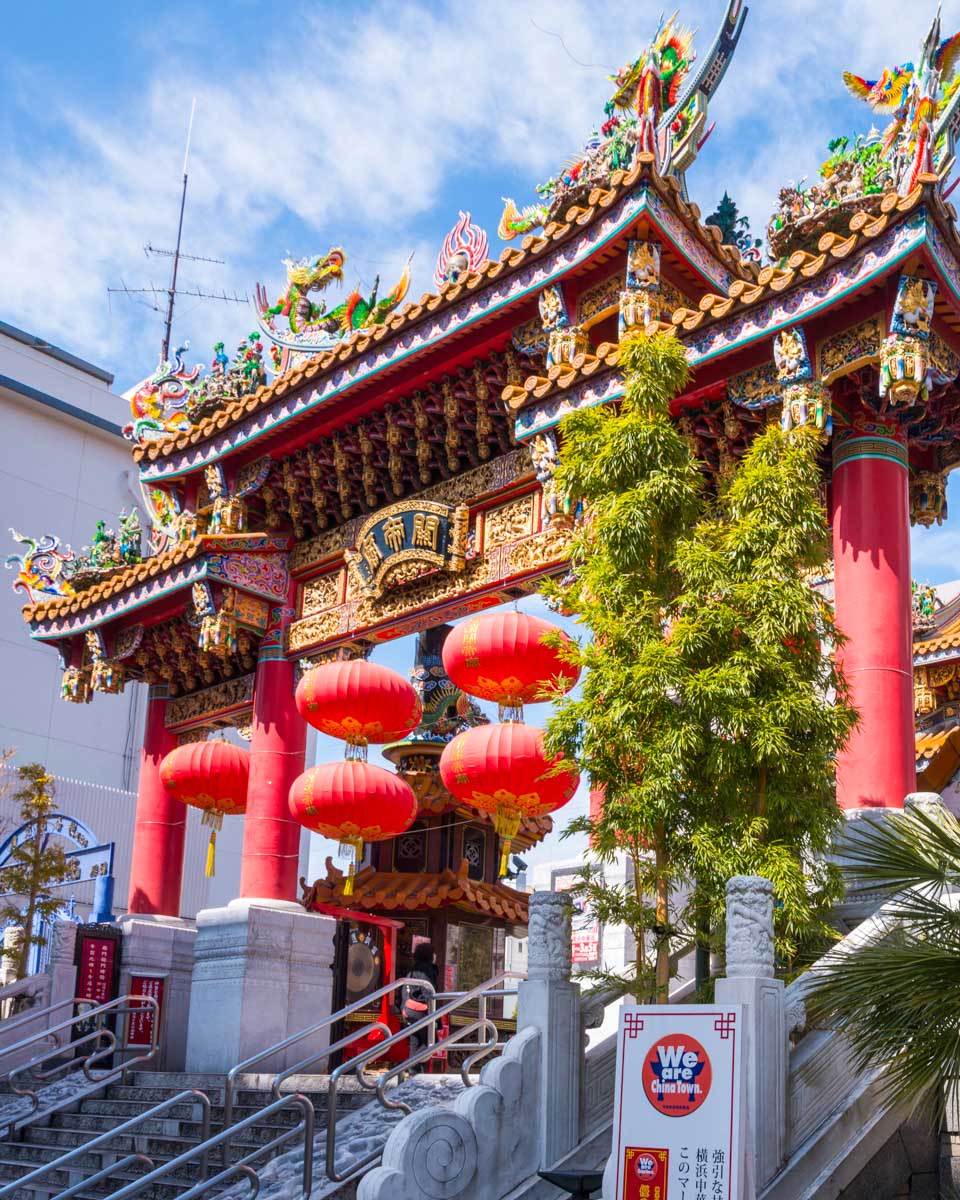
After lunch at Shichifuku, walk for around three minutes to Kanteibyo Temple, one of Yokohama Chinatown’s most striking landmarks. It’s dedicated to Guan Yu, a Chinese military commander who became a symbol of loyalty, prosperity, and business success. The original temple dates back to 1871, though the building you see today opened in 1990 after several rebuilds.
You don’t need long here, probably just half an hour, but it’s worth taking your time to look around. Between the red lanterns, gold details, dragon carvings, and incense drifting through the courtyard, a lot is going on.
It’s still an active place of worship, so be respectful of anyone praying and check the signs before heading inside the main shrine. Kanteibyo is usually open daily from 9 am to 7 pm, but it’s worth checking the current temple information before you visit.
Stop 2: Stroll through Yamashita Park
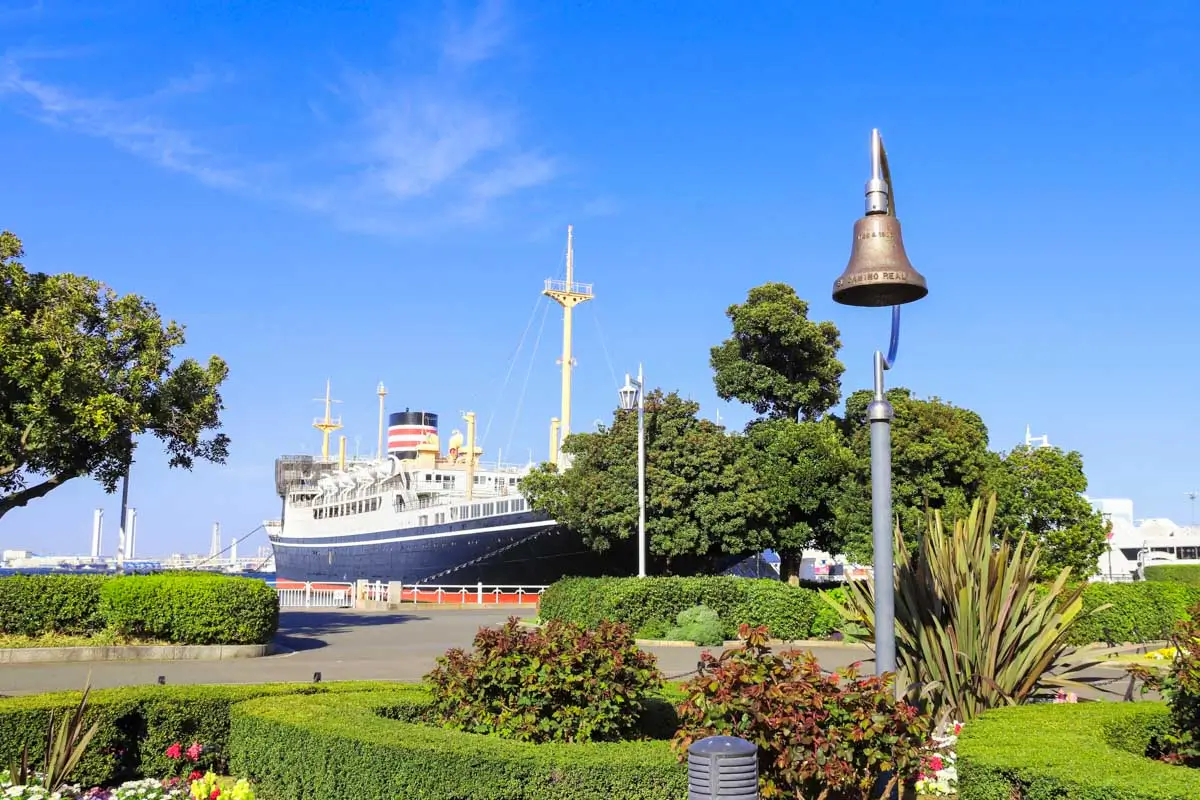
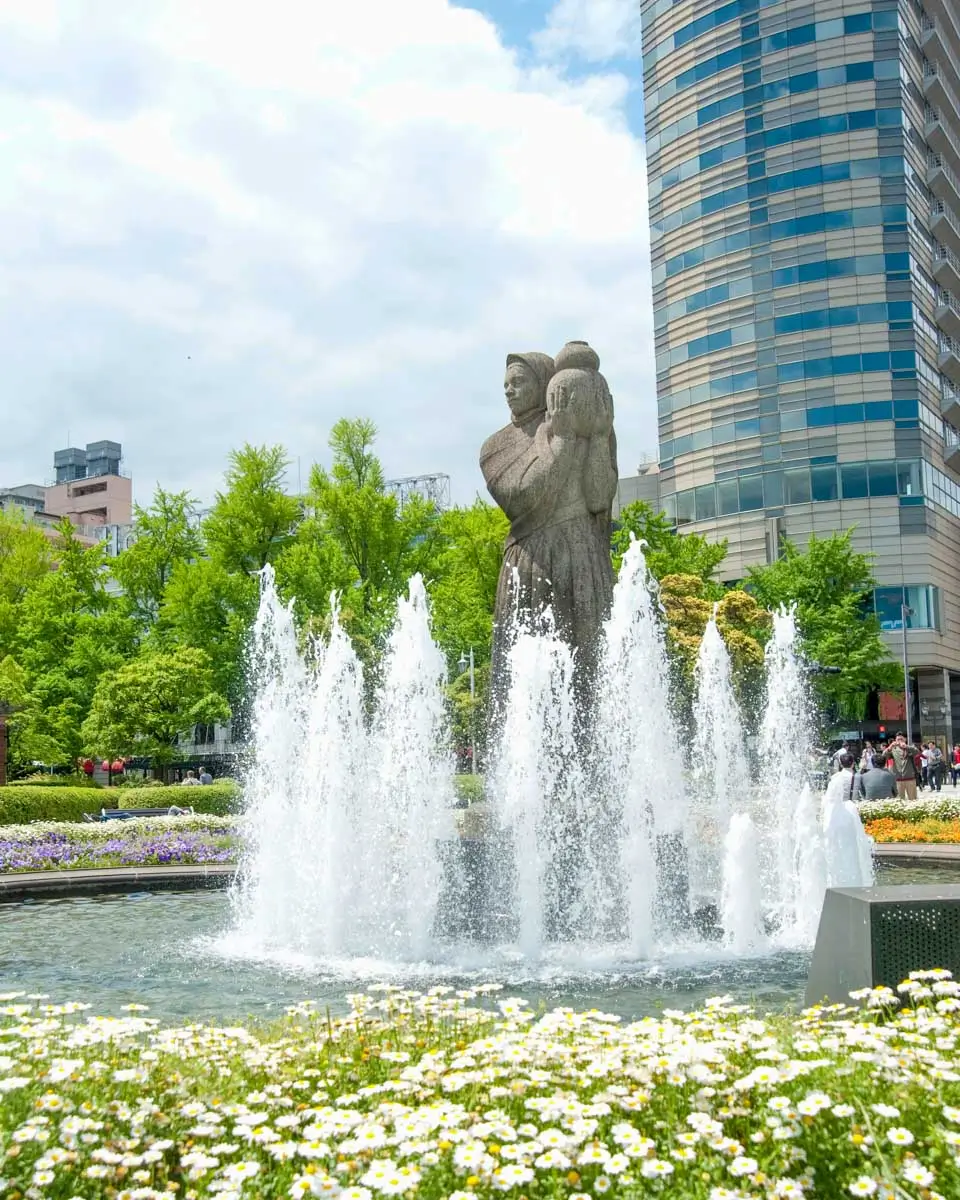
From Kanteibyo, it’s an easy 10-minute walk to Yamashita Park, a long stretch of waterfront overlooking Yokohama’s port and one of our favorite places to slow down for a bit. Built in 1930 on land reclaimed from rubble left behind after the Great Kanto Earthquake, it became an important part of Yokohama’s recovery.
The park runs for almost 700 meters (about half a mile) along the harbor, but you won’t need more than about 40 minutes to walk around. As you walk along the promenade, you’ll pass lawns, fountains, flower beds, a few monuments, even Hikawa Maru, a passenger ship launched in 1929 that now sits permanently beside the park.
Overall, it’s a good place to take a short break by the water and use the public facilities before moving on. If you’re visiting in spring or autumn, keep an eye out for the rose garden too. Check the official Yamashita Park information before you go to see what’s happening during your visit.
Stop 3: Enjoy panoramic harbor views from Osanbashi Pier
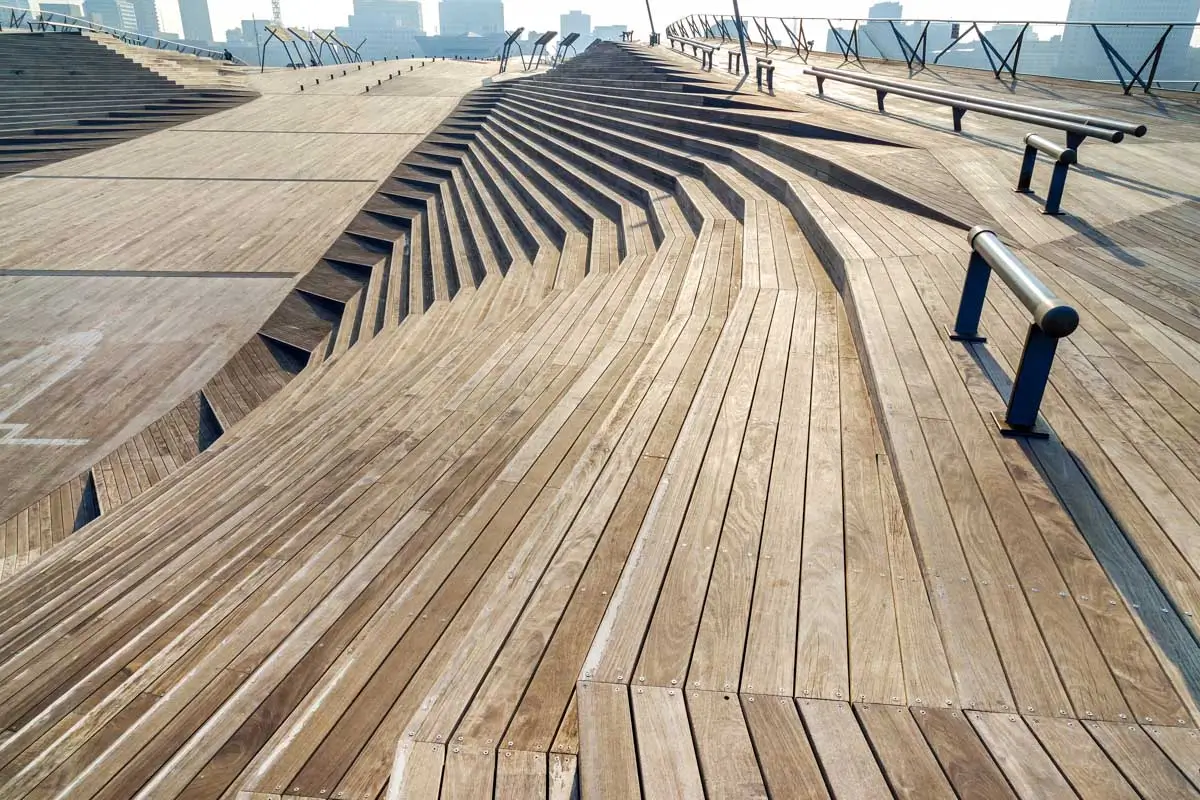
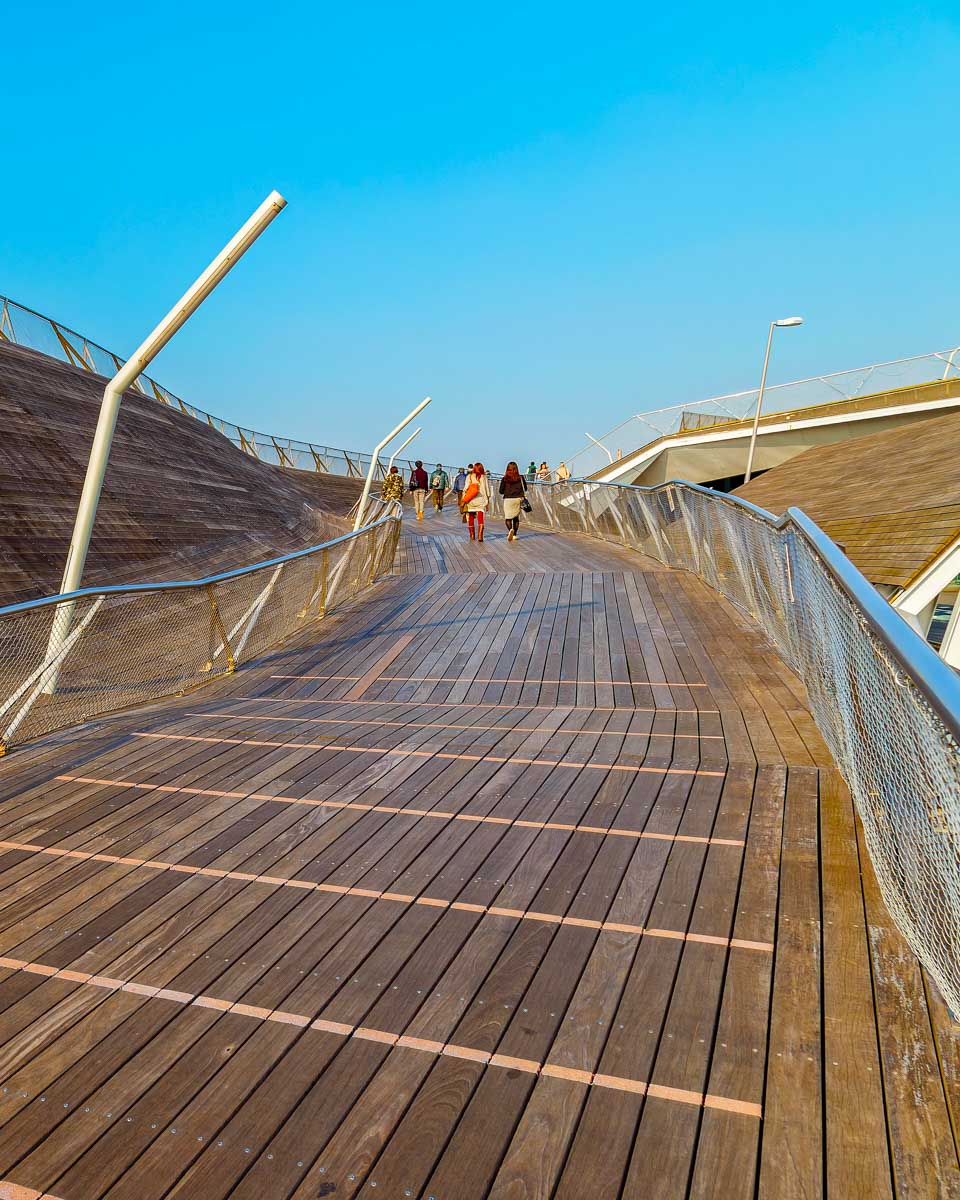
Continue along the waterfront for another 15 to 20 minutes, and you’ll reach Osanbashi International Passenger Terminal. Even if you’re not catching a cruise, it’s worth stopping here for the rooftop deck.
Head upstairs and wander along the curved timber walkways, designed to represent rolling waves, where you’ll get wide-open views across Yokohama Bay. From here, you can see Minato Mirai, Cosmo Clock 21, the Red Brick Warehouse, and Yokohama Bay Bridge, so keep your camera handy. If you happen to be here after dark, the views are even better, with the pier and surrounding attractions all lit up.
Give yourself around 45 minutes to walk out toward the end of the pier, take some photos, and enjoy the views without rushing. The rooftop is free and usually open 24 hours a day, but stick to the designated paths, as the grassy areas aren’t for walking. Check the official Osanbashi information before you go.
Stop 4: Browse the Red Brick Warehouse and continue into Minato Mirai
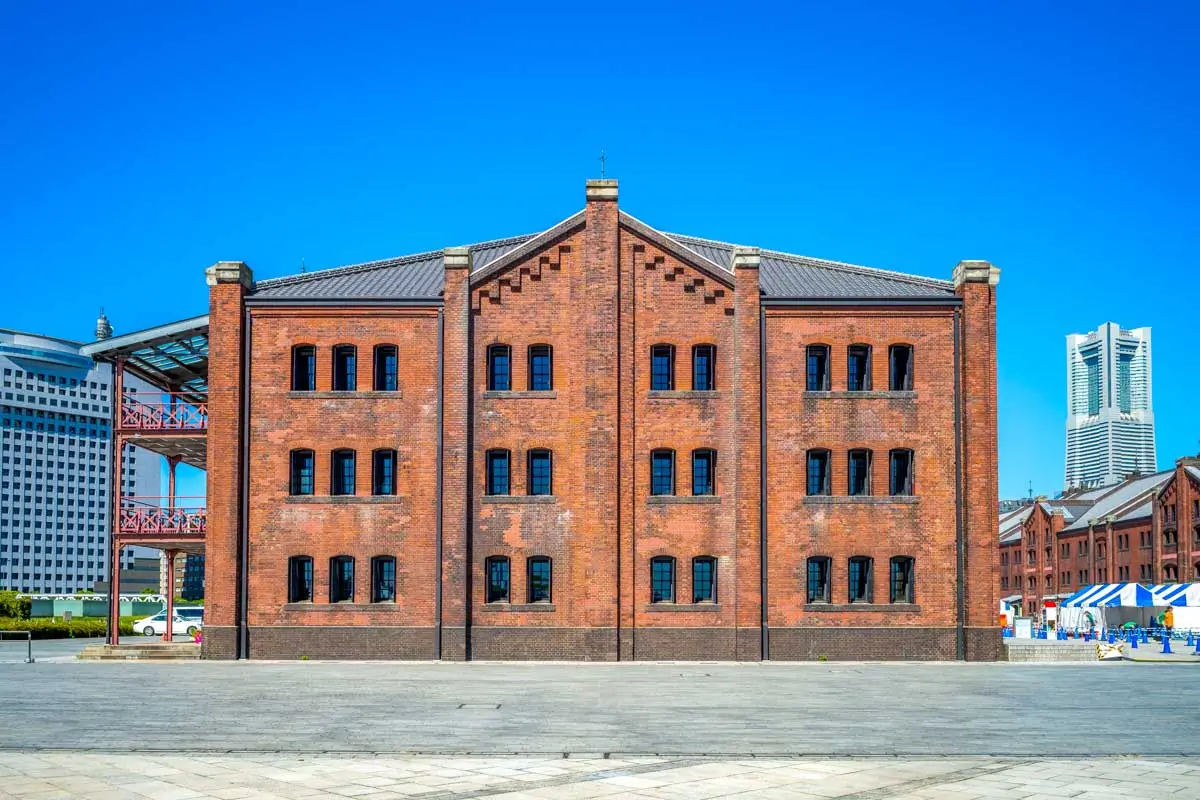
Next up is the Yokohama Red Brick Warehouse and Minato Mirai, where you’ve got about an hour to look around. It’s an easy 10 to 15-minute walk from Osanbashi through Zou-no-Hana Park, then along the waterfront.
The two old warehouses have been turned into shops, cafés, restaurants, galleries and event spaces, so there’s lots to see. Wander around, check out local products and Japanese gifts, or grab a coffee or something sweet if you need a break. You might even catch a market, festival, or seasonal event happening outside, depending on when you visit.
From there, keep walking toward Minato Mirai, passing Marine & Walk, Yokohama Hammerhead, and the Cosmo Clock 21 along the way. Take your time in Minato Mirai, and around 6 pm, start walking toward Noge for dinner. It should take around 15 to 20 minutes from here.
Dinner – Enjoy sushi and seafood in Noge
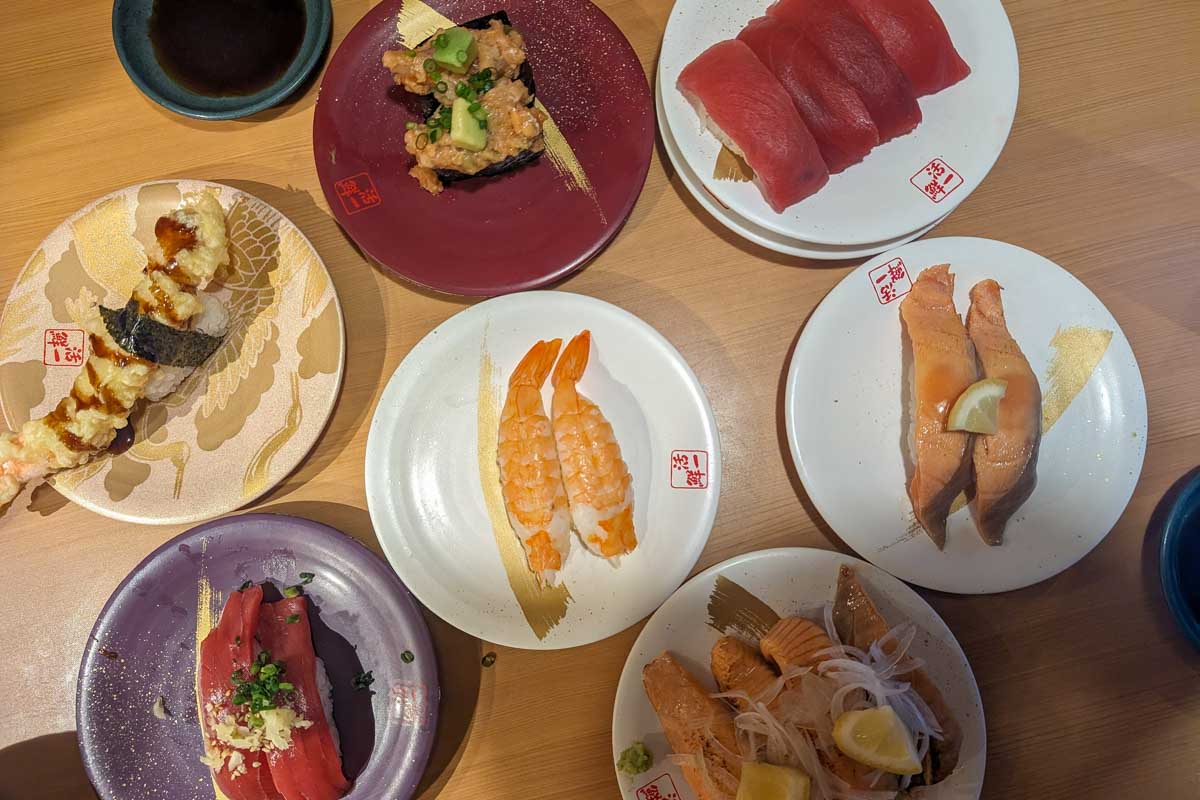
Noge feels pretty different from modern Minato Mirai. The streets are packed with little izakayas and restaurants, with red lanterns hanging above the narrow lanes, and it’s just a fun place to spend the evening after a day of sightseeing.
For dinner, we’re sending you to Sushimazume Noge Main Branch. It’s a casual sushi spot where you can order nigiri, sashimi, oden, and a few Japanese bar snacks without spending too much. Expect to spend around 2,500 to 4,000 JPY ($15 to $25 USD) per person and leave completely full.
It’s usually open from 5 pm–11 pm Tuesday–Friday and 12 pm–11 pm on weekends and public holidays, but it’s normally closed on Mondays. Best to check the official menu and restaurant details before you go.
If it’s busy, don’t worry too much. Noge is packed with food spots, so finding another place to eat should be quick and easy. Keep in mind that English can be limited, so having a translation app ready will make things a lot easier.
Evening – Experience Noge after dark

If you still have some energy left after a long day of sightseeing, give yourself an hour or so to wander around Noge. Just walk along Noge Shopping Avenue, have a look down the little side streets, and see what catches your eye. You’ll find tiny izakayas, yakitori spots, karaoke bars, and casual drinking places one next to another.
From there, head toward Miyakobashi Shotengai, a curved row of tiny two-story bars by the Ooka River. Some have only a few seats and mostly cater to regulars, so pick what looks welcoming and pop in if there’s space. A translation app will come in handy too, as English can be pretty limited.
If you’re still in the mood for another drink, try Craft Beer Kitchen for craft beer or SimonS for wine. Otherwise, wander around for a bit, enjoy the nighttime atmosphere, and head back to Sakuragicho Station when you’ve had enough.
Related Read: Not sure what to bring? Check out our Japan packing list for everything we recommend packing before your trip!
Japan Rail Pass!
The Easiest Way to Travel Japan By Train
If you’re planning to explore Japan, the Japan Rail Pass (JR Pass) is hands down the easiest and most affordable way to get around. It’s a special 7, 14, or 21 day pass for foreign visitors that gives you unlimited rides on Japan’s famous JR trains, including the high-speed shinkansen (bullet trains)!
Why We Love the JR Pass
Pro Tip: If you’re only exploring one region of Japan, consider a Regional Pass instead (like the Kansai, Hokkaido, or Kyushu Pass). They’re cheaper and perfect for smaller trips!
Where to Get Your Pass
We personally recommend buying your pass online in advance through JRPass.com — they’re an official reseller with fast worldwide delivery and English support, making the whole process super simple. They even offer handy add-ons like pocket WIFI and meet & greet services! Still not sure if the JR Pass is right for you? Check out our Ultimate Guide to the Japan Rail Pass for a full breakdown of costs, inclusions, and when it’s worth it!
Day 2
Morning/Afternoon – Take a day trip to Kamakura with your private guide
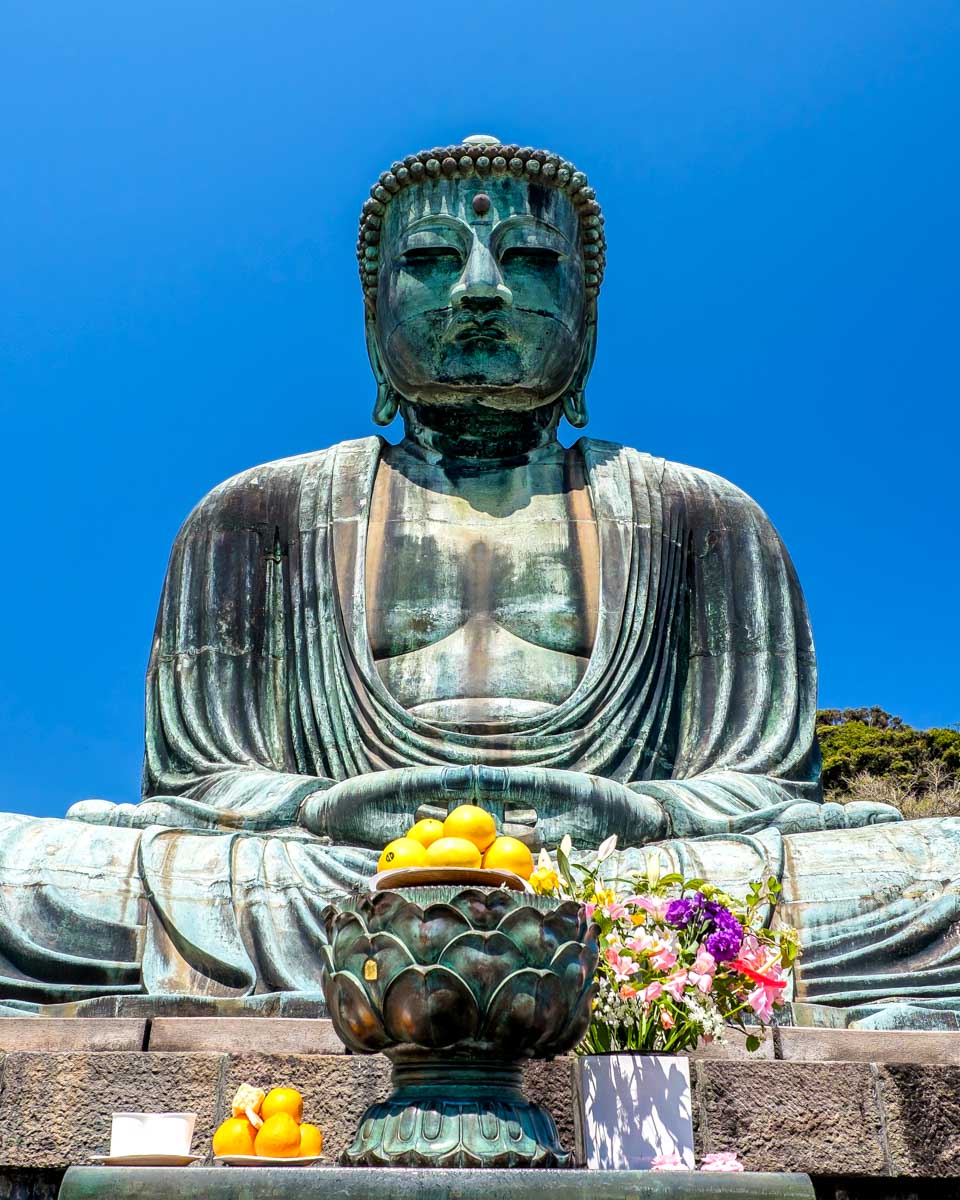
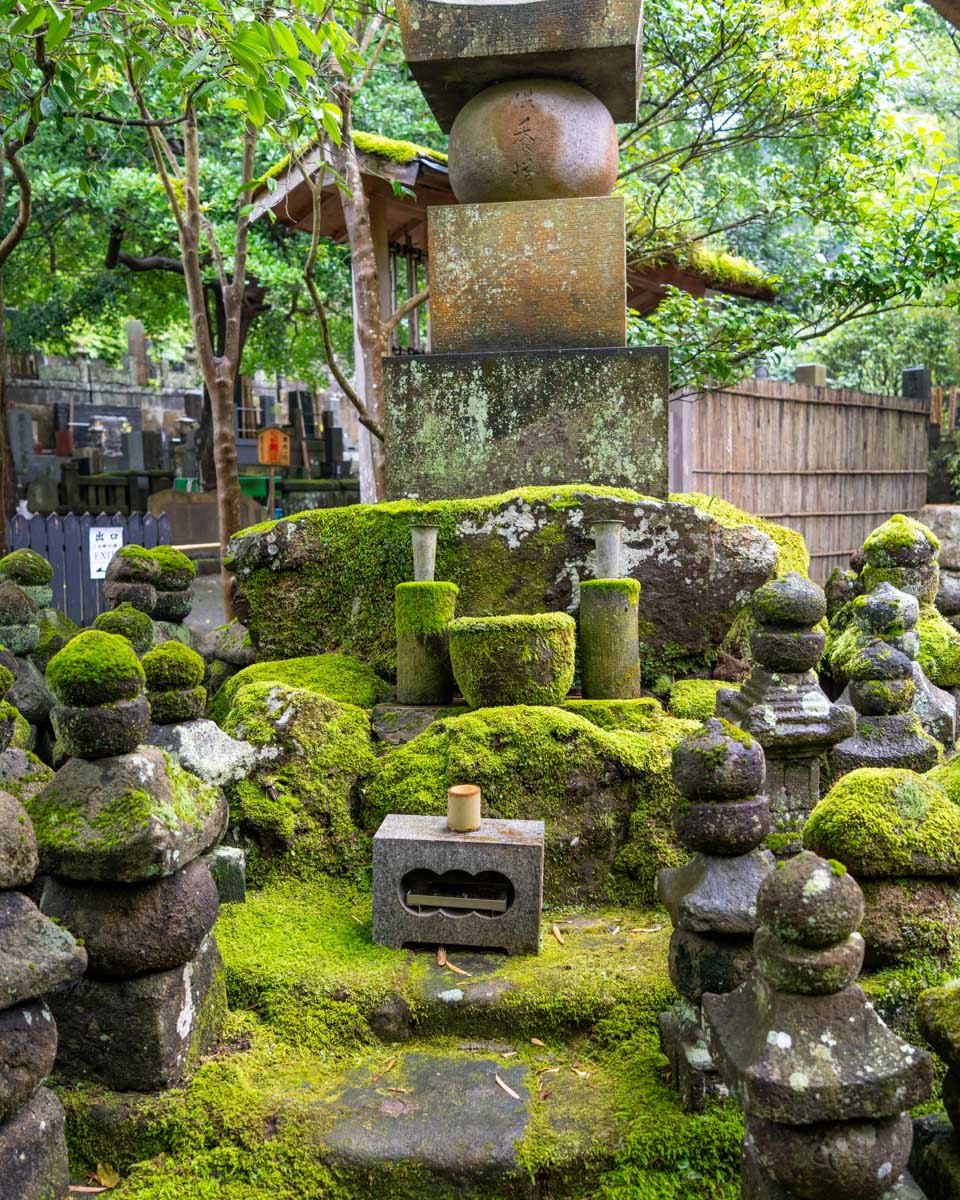
Your second day doesn’t start super early, so you’ve got time to sleep in and have breakfast at your hotel or somewhere nearby before meeting your guide at around 9 am for this private six-hour tour of Kamakura. The tour ends around 3 pm and includes a lunch stop along the way, although lunch, transportation, admission fees, and personal expenses are all paid separately.
With your nationally licensed, English-speaking guide, you’ll explore Kamakura using public trains and buses, and possibly a local taxi, as a private vehicle isn’t included.
You can choose from four different sights, but we recommend picking three and exploring at a slower pace rather than trying to fit all four in and rushing through everything. If time allows, we’ve also included an optional fourth stop.
Stop 1: Walk through the bamboo garden at Hokokuji Temple
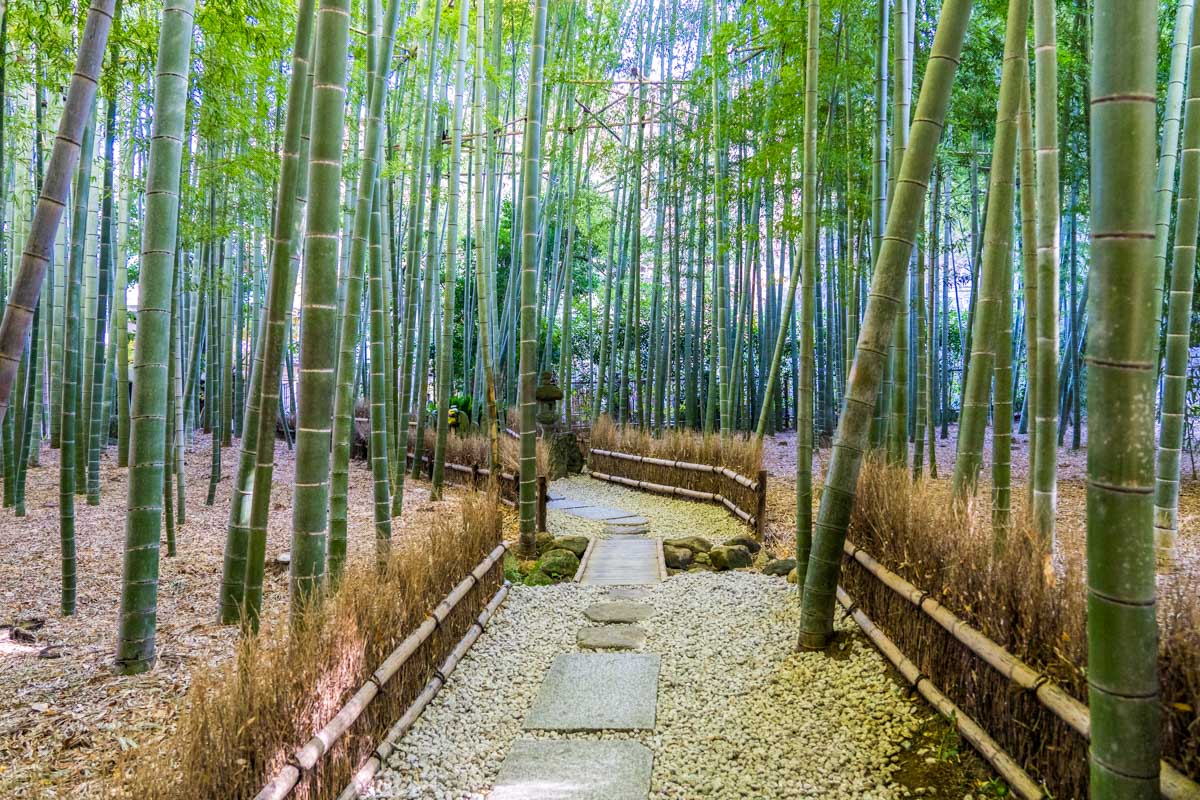
Start at Hokokuji Temple, or the Bamboo Temple as it’s often called. It dates back to 1334, and its peaceful setting offers a lovely contrast to the busy streets around Kamakura Station. But let’s be honest, everyone usually comes here for the bamboo. So, follow the path behind the main hall, and you’ll find a garden with more than 2,000 tall moso bamboo stalks. It is quite the sight!
Stroll around the rest of the grounds too, where you’ll see moss-covered stone lanterns, a dry rock garden, and caves carved into the hillside. There’s also a little tea house overlooking the bamboo, where you can stop for matcha and a Japanese sweet.
The bamboo garden is usually open from 9 am to 4 pm, with the last matcha orders around 3:30 pm. Matcha costs around 600 JPY ($4 USD), plus the garden entrance fee of 400 JPY (about $2.60 USD). Not bad at all!
Stop 2: Learn about Kamakura’s samurai history at Tsurugaoka Hachimangu
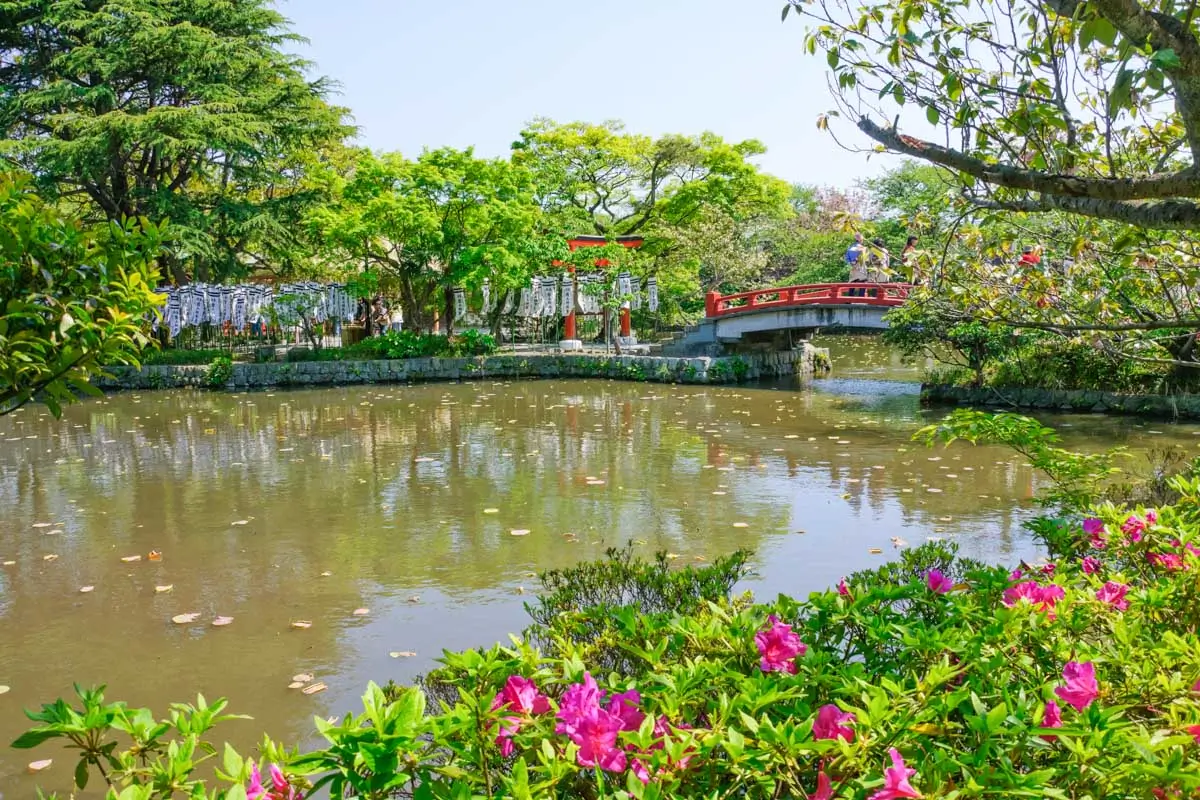
From Hokokuji Temple bamboo garden, continue on to Tsurugaoka Hachimangu, Kamakura’s most important Shinto shrine and one of the best places to understand the city’s connection to the samurai. Minamoto no Yoritomo moved the shrine here in 1180, and not long after, he established the Kamakura shogunate, Japan’s first long-lasting samurai government.
Take your time walking along the main approach, past the two ponds, before heading up the stone steps to the main shrine. Once you reach the top, turn around and look back down Wakamiya Oji. You get a great view of the long ceremonial avenue stretching through central Kamakura.
The main shrine grounds are free to enter, although the museums and Treasure Hall cost extra. It’s also only about a 10-minute walk from Kamakura Station, so it’s easy to fit into your day. You can check the current shrine information here before you visit.
Lunch – THANK Ramen
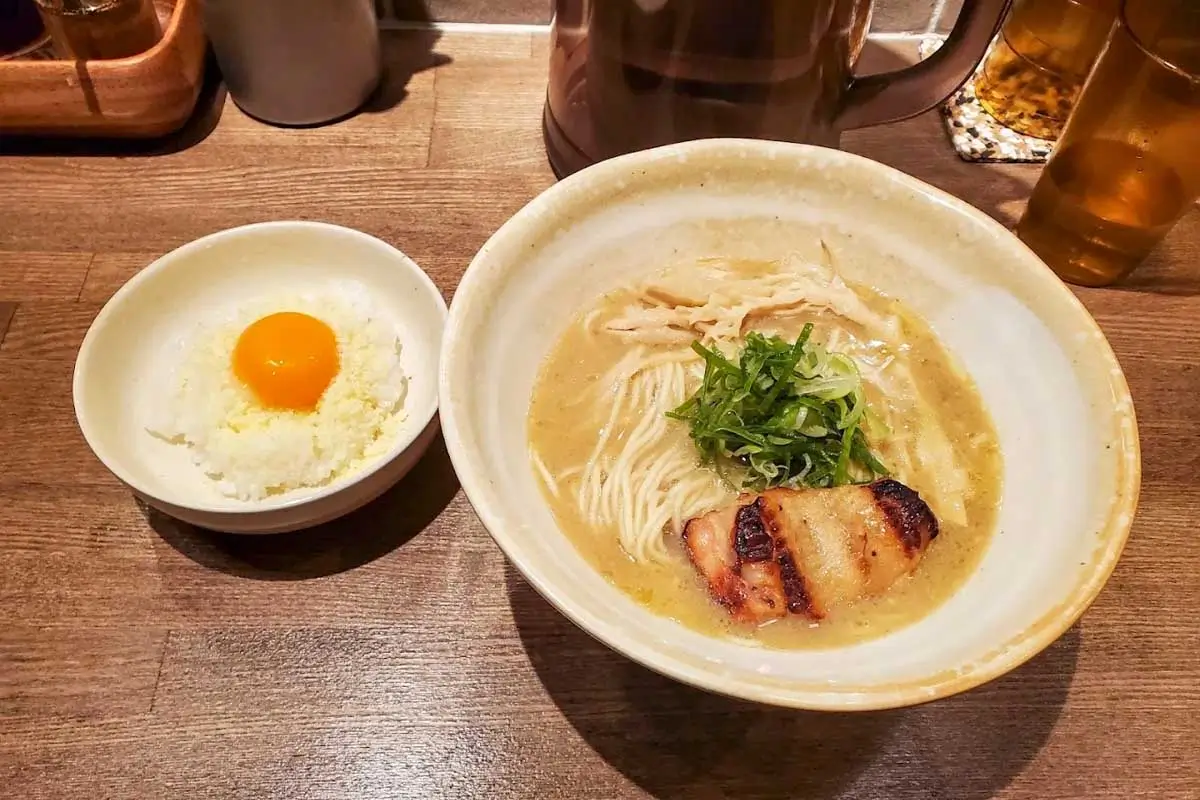
After exploring Tsurugaoka Hachimangu, walk around 10 minutes to THANK ramen Kamakura Komachi. This small, laid-back ramen spot has a modern feel, making it a nice place to sit down and rest your feet after the morning. We suggest giving yourself around an hour here.
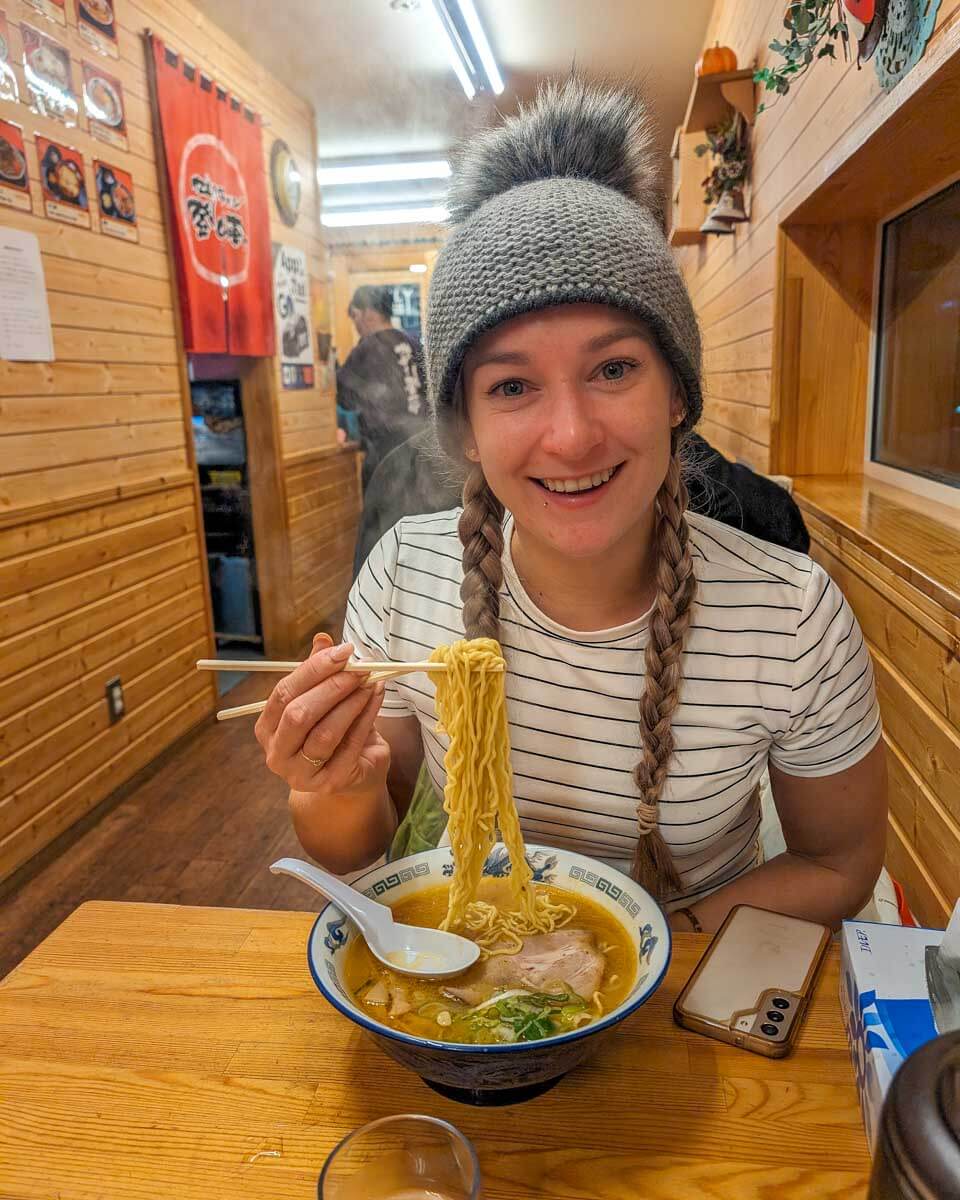
They’re known for their creamy chicken potage ramen. Go for the classic Toripota and choose sarari for a lighter soup or poteri if you want something thicker. The Kamakura Ramen, made with local vegetables, is another good choice and only available at this branch. If you’re still hungry, try adding the egg yolk and cheese rice to the leftover broth to make a creamy little risotto-yummy!
It’s also handy that there’s an English menu with photos, so ordering is easy with just pointing at the one you like. Payment is cashless too. If your guide suggests somewhere else that works better for the route or your dietary needs, though, just go with that.
It’s open Monday through Friday from 11 am to 4 pm and 5 pm to 8 pm, while on weekends and public holidays, it’s open from 11 am to 8 pm.
Stop 3: See the Great Buddha at Kotoku-in
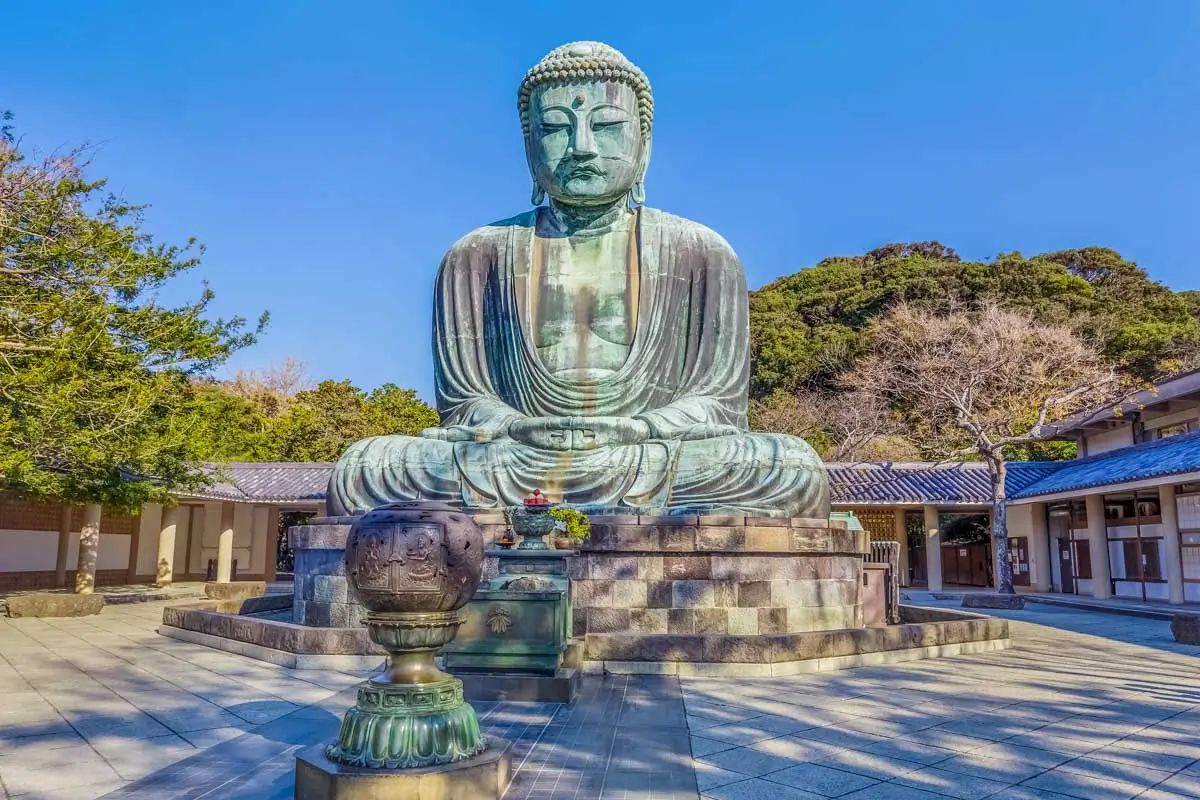
After lunch, make your way over to Hase to see the Great Buddha of Kamakura at Kotoku-in. The huge bronze statue dates back to the 13th century and has been sitting out in the open for centuries after the hall that once surrounded it was destroyed.
Take some time to walk around and see it from different angles. If the interior is open, you can also go inside the hollow statue for an extra 50 JPY (around $0.30 USD). General admission is currently 300 JPY (around $2 USD) for adults.
Kotoku-in is about a seven-minute walk from Hase Station, so getting there is pretty straightforward. It’s open from 8 am to 5:30 pm between April and September, and until 5 pm from October through March. Before you go, have a quick look at the current admission and opening information.
Optional fourth stop: Add Hasedera Temple if time and energy allow
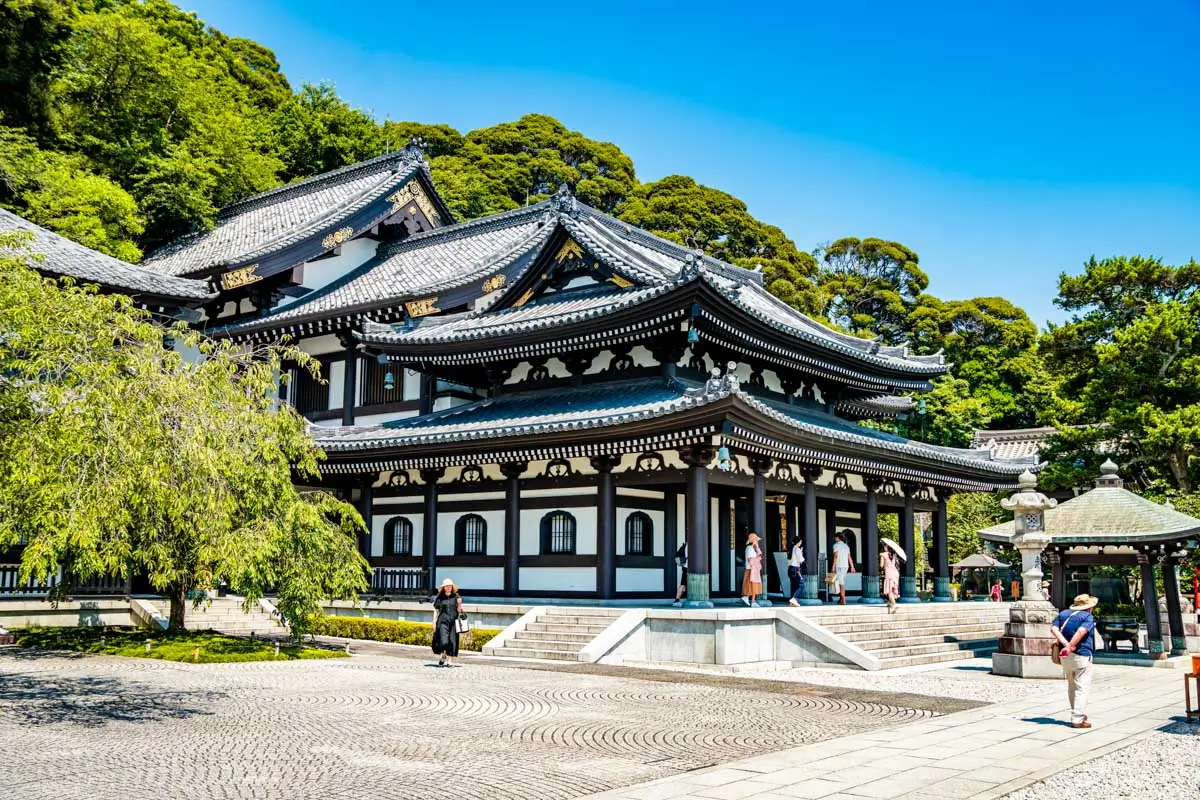
Hasedera Temple is only around five minutes on foot from Kotoku-in, so it’s a great fourth stop if time allows. Just don’t feel like you have to squeeze it in. We’d rather keep your 90-minute lunch and give you enough time to get back without rushing.
The temple is known for its huge gilded Kannon statue, landscaped gardens, a small cave filled with carved figures, and views out toward the coast. Just keep in mind that the temple is built on a hillside, with quite a few steps and sloping paths, so it might be better to skip it if you’re already tired or have mobility issues.
Admission is currently 400 JPY (around $2.50 USD) for adults, and it’s usually open from 8 am to 5:30 pm from April through June, and until 5 pm from July through March. Whether you end after the third stop at Kotoku-in or have time to make it to this fourth location, your tour should wrap up around 3 pm. Just let your guide know where you’d like to finish, then head back to your hotel for a well-earned rest.
Related Read: Visiting Japan for the first time? Check out our list of common mistakes to avoid when planning a trip to Japan and etiquette mistakes to avoid in Japan for helpful tips before you go!
Late afternoon – Relax back at your hotel
Once you’re back in Yokohama, head to your hotel and take a proper break before dinner. After six hours of trains, buses, temple grounds, and plenty of walking, you’ll probably be ready to put your feet up for a while!
Take a shower, lie down for a while, or grab a coffee somewhere near your hotel if you feel like getting back out for a bit. You could also use the time to sort through your photos or pack a few things for the next day, so you’re not doing it later in the night.
If your hotel has a pool, even better. Spend an hour or so lounging with a drink, or treat yourself to a foot massage after all that walking. That way, you’ll have some energy left for dinner.
Dinner – Dynamic Kitchen & Bar Hibiki Yokohama Sky Building
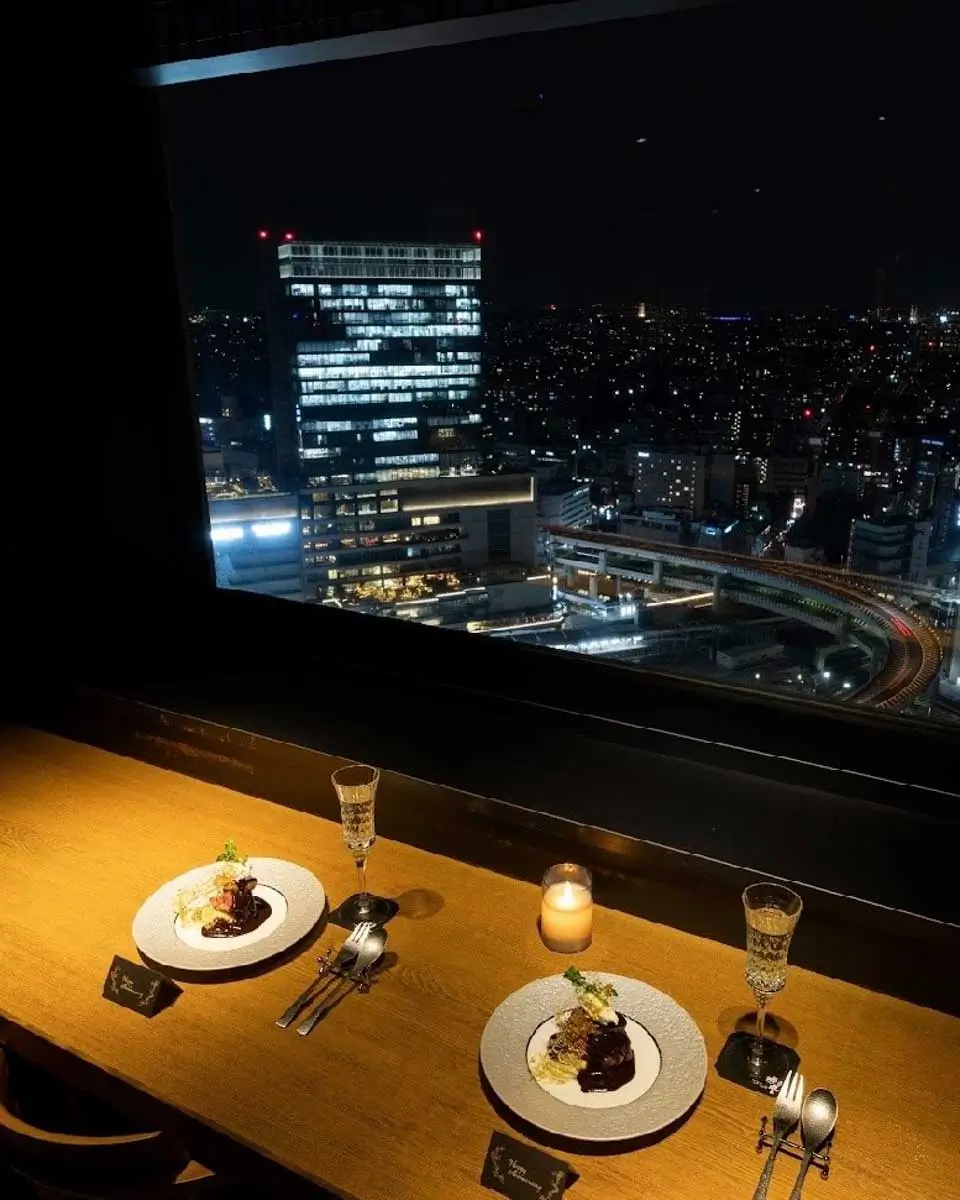
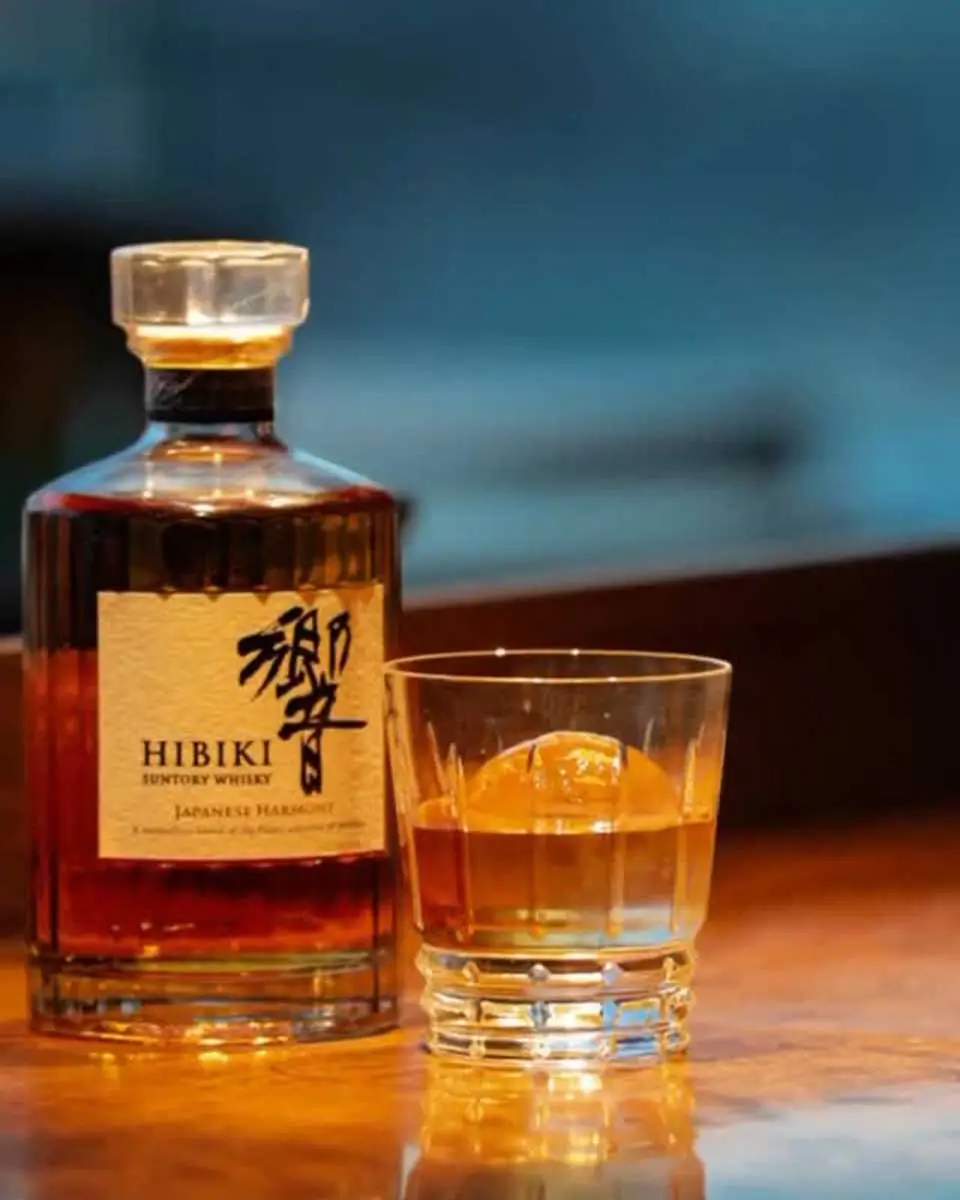
After a long day exploring Kamakura, you’ll probably be ready for some delicious food. Around 6:30 pm, head to Dynamic Kitchen & Bar Hibiki, a modern Japanese restaurant on the 28th floor of the Yokohama Sky Building. It’s only about a three-minute walk from Yokohama Station’s east exit, so it’s easy to get to after heading back to your hotel to freshen up.
The food here is seasonal Japanese, with sashimi, fresh seafood, Japanese Black Wagyu, and Hibiki’s signature stone-pot rice. Since it’s your last dinner in Yokohama, this is a good night to go for one of the set courses, which usually include a mix of appetizers, sashimi, steak, and rice or noodles.
Expect to spend around 6,000 to 10,000 JPY ($40 to $65 USD) per person, plus drinks. Dinner is served daily from 5 pm to 10 pm, although the restaurant may occasionally close when the Sky Building does.
We recommend booking ahead and requesting a window table or counter seat if you can, since not every table has a view. There’s an English website and online booking page too, which makes reserving a table online nice and easy!
Evening – Enjoy the view before returning to the hotel
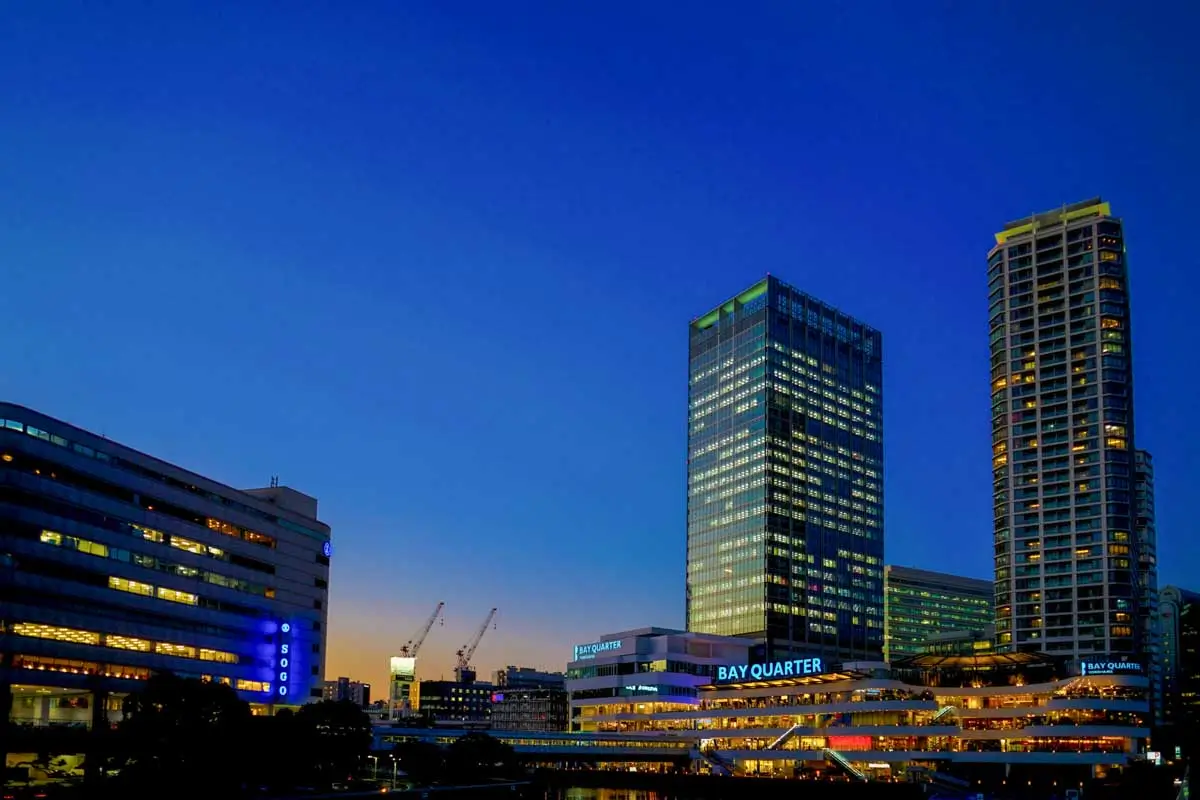
With dinner done, there’s no need to rush off to another activity. Since it’s your last night in the city, take your time eating and later enjoy the views before calling it a night. After a full day of walking around, it’s actually nice to just sit back for a while instead of trying to squeeze one more attraction into the evening. Trust us on this one!
But if you still have some energy left, we’re not going to stop you! Have a look around the shops near Yokohama Station or take a short walk through Yokohama Bay Quarter. You could grab a coffee or dessert here, wander around the waterfront, or linger over the city lights one last time.
Otherwise, Yokohama Station is right next to the Sky Building, so getting back to your hotel is fast and easy whenever you’re ready.
Related Read: Want even more ideas for your trip? Check out our guide to the best things to do in Yokohama for our favorite attractions, activities, and places to explore around the city!
Where to Stay in Yokohama
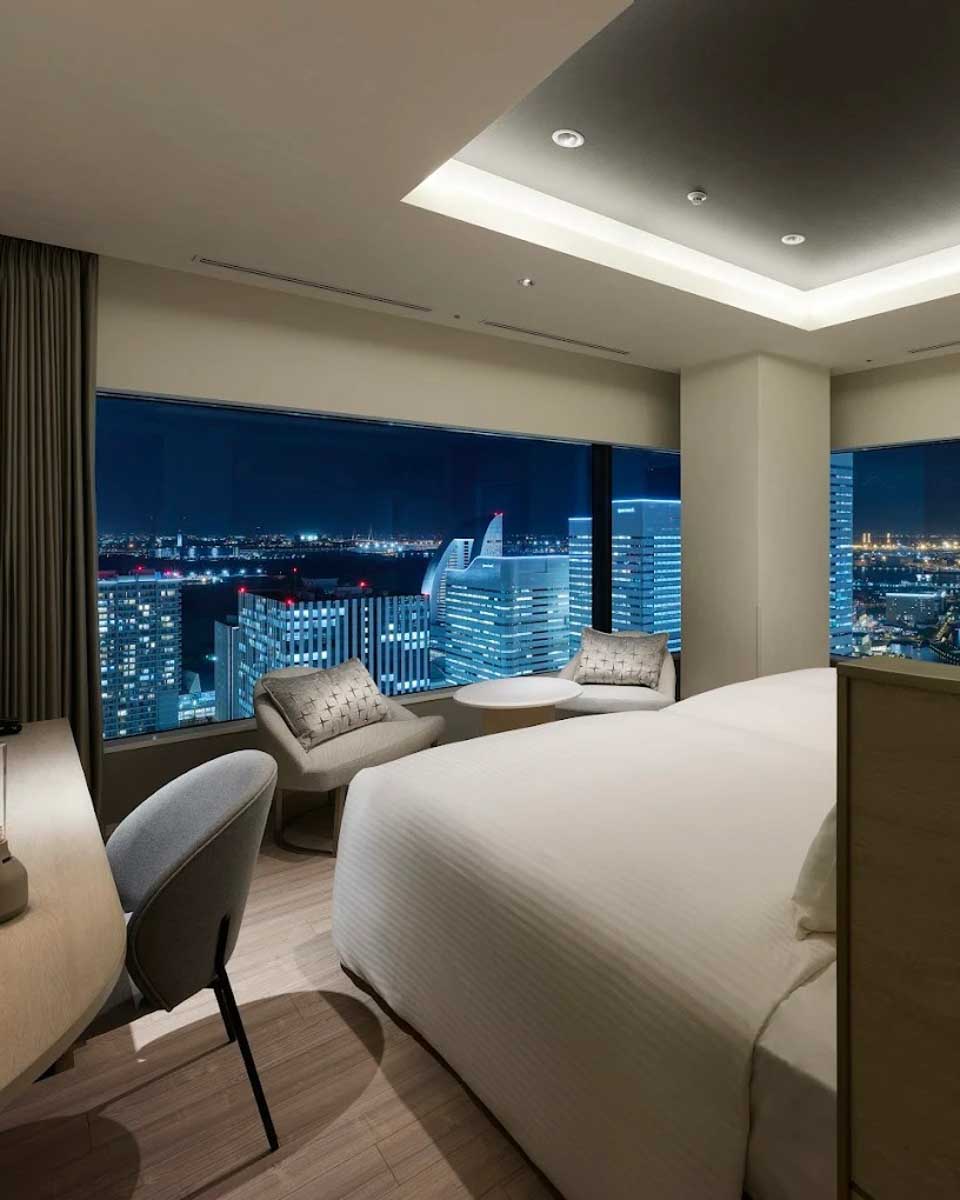
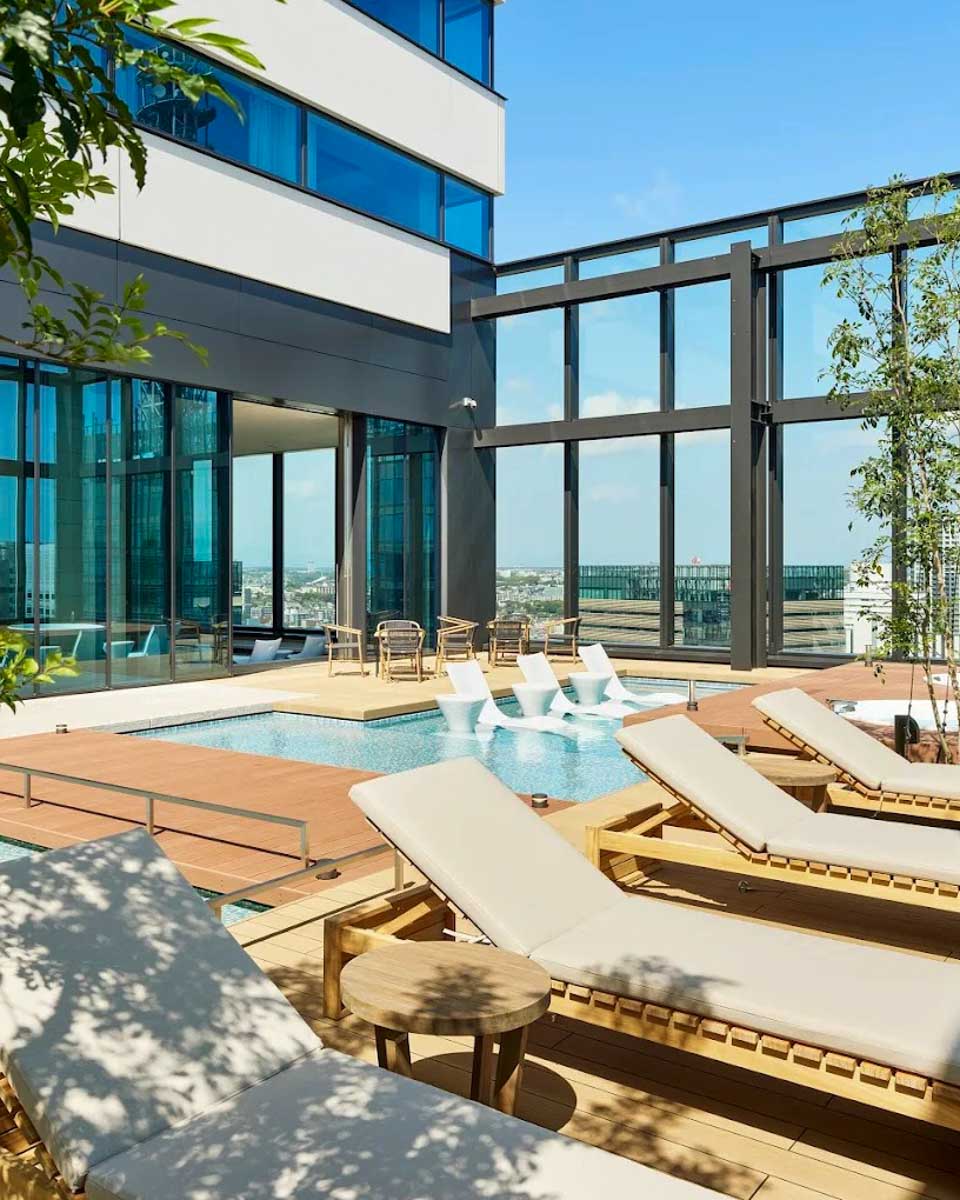
With only two days in Yokohama, staying somewhere central will make this itinerary much easier. We’d look around Minato Mirai, Kannai, Yamashita Park, or Chinatown, where you’ll be close to the waterfront, plenty of restaurants, good transport links, and many of the places you’ll be visiting.
To keep things simple, we’ve picked three great Yokohama hotels for different budgets.
Luxury – $$$
Mitsui Garden Hotel is a gorgeous choice if you want a sleek, modern stay with incredible city and bay views. It’s located in the Minato Mirai area, close to the waterfront, shops, restaurants, and train links, so it’s very handy for sightseeing. The hotel also has a sky pool, outdoor terrace, restaurant, and guest rooms on higher floors, so it’s a sleek, city escape rather than just a place to sleep.
Rooms start from around $200 USD per night. Check prices for your dates and book this stay on Booking.com!
Mid-range – $$
Hyatt Regency Yokohama is a fantastic mid-range option, especially if you want to stay close to Yamashita Park, Chinatown, and Osanbashi Pier. The hotel has a polished, stylish feel, with a design inspired by Yokohama’s mix of Japanese and Western influences. We think it’s a great pick if you want something comfortable and central, without going all-in on the most expensive waterfront hotels.
Prices typically start from $150 USD per night. Check availability and book this stay on Booking.com.
Budget – $
APA Hotel & Resort Yokohama Bay Tower is a great budget-friendly choice in a super convenient location. It’s a huge hotel, with more than 2,300 rooms, plus a large public bath, open-air bath, pool, fitness center, and several restaurants and cafés. Rooms are compact, as you’d expect from APA, but for the price and location, it’s a really practical base for exploring Yokohama.
Rooms here start from $60 USD per night, but vary by season. Check availability and book your stay on Booking.com.
For even more options, check out all the hotels in Yokohama here!
Related Read: If you’re still figuring out where to stay, our Yokohama Hotel Guide breaks down the city’s best areas and hotels to make it easy!
Book your Airport Taxi in advance
Start your trip stress-free by booking your airport taxi before you arrive. You’ll skip the long lines, avoid overpriced fares and scams, and won’t have to worry about explaining your hotel address to a driver. Simply prebook your airport pickup online here, and your driver will be ready to take you directly to your hotel!
Renting a Car in Japan

Japan’s trains are great, but if you want to explore rural areas, scenic routes, or off-the-beaten path hidden gems, renting a car offers unmatched flexibility. Driving in Japan is generally safe, with well-maintained roads and clear signage, though there are some unique rules and customs to be aware of.
We always book with Discover Cars and can’t recommend them enough. It’s super easy to compare multiple provider prices, check company ratings, filter for the type of vehicle you want, and add affordable full coverage insurance. If you want a full breakdown, check out our Discover Cars review here.
Tips for Renting a Car in Japan
What You Need to Rent a Car in Japan
Ready to hit the road? Discover the freedom of exploring the Japan on your own terms!
Airalo e-sim
Up To 15% Off With Code “DTRAVEL10”
What’s an eSIM?
An eSIM is a digital version of a SIM card. Instead of buying a little plastic chip and swapping it into your phone, you just download it. It connects your phone to a local network in whatever country you’re visiting — no stores, no waiting, and no fiddling with tiny cards.
In simple terms, it’s the easiest way to get data and stay connected while traveling.
We’ve tested a bunch of eSIMs in North America, and after a few frustrating experiences, we’ve found our favorite — Airalo. It’s fast, reliable, and incredibly easy to use. You can set it up in minutes (even my mom managed it solo on her first try!), and the prices are some of the best out there.
Bonus: We’ve got an exclusive 15% discount for our readers. Use the codes:
Thanks for reading!

We loved our time in Yokohama! Between the beautiful waterfront, incredible food, lively streets of Noge, and an easy day trip to Kamakura, there’s so much you can fit into just two days. It’s a fun city to explore and definitely deserves a spot on your Japan itinerary!
Still planning the rest of your trip? Check out all of our Japan travel blogs here! As lifelong travelers, we have tons of helpful guides, itineraries, and tips to make planning your trip a whole lot easier. Here are a few more blogs you might find useful. Enjoy!
Where to Stay in Nagoya, Japan: 4 Best Areas & Hotels
Where to Go in Japan Based on Your Travel Style
The Services We Recommend
From hotels to guided tours, we only recommend services we know and trust. Here are our recommended partners so you can explore Japan with confidence.
Book Hotels
With Booking.com